We have selected reliable CMMs of the gate-type, arm-type, and handheld-type from six different manufacturers*, based on reviews and results published on their respective manufacturer's official websites.
We have categorized the selected CMMs into three groups: "Machines with Excellent Measurement Accuracy and Stability," "Machines with high User-Friendliness and Versatility," and "Machines Compatible with Smart Factory Solutions." On this case, you can find out more about how each CMM differs from the others and what challenges it can address.
(*)Selected the top-ranking manufacturers by searching "CMM" on Google (as of November 30, 2023).

Source: KEYENCE Website(https://www.keyence.com/products/3d-measure/cmm/xm/)
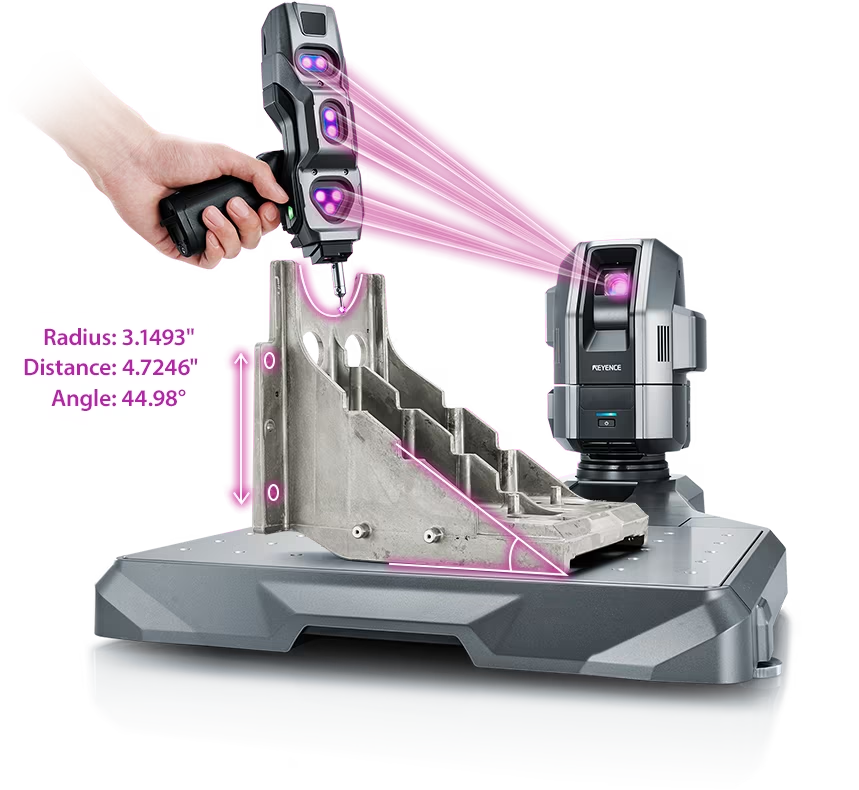
This CMM has a caliper-like feel, enabling even beginners to perform high-precision measurements. It can be carried without the need for temperature control, allowing for immediate measurements at any desired location and time. As it doesn't require a large installation space, it's a CMM with a low entry barrier.

Source: Carl Zeiss Website(https://www.zeiss.com/metrology/products/systems/cmm.html)
Utilizing linear drive on all axes, this CMM boasts high precision with a maximum permissible length measurement error of 0.3+L/1000μm, repeatability of ±0.2μm, and resolution of 0.001μm. The reduced occurrence of errors allows for a decrease in the need for remeasurement.

Source: Mitutoyo Website(https://www.mitutoyo.com/products/coordinate-measuring-machines/)
A CNC CMM that was first developed in 1976.
It features applications that respond to the demand for "Smart Factories" by allowing monitoring of operational status and maintenance management of the machine through the network.
Reasons for Selection

Source: KEYENCE Website(https://www.keyence.com/products/3d-measure/cmm/xm/)
This CMM allows measurements from any posture or angle with a user-friendly, caliper-like feel. No specialized operators or dedicated measurement rooms are required. The XM Series can be used as a replacement for a vernier caliper, in environments where bridge-type machines are difficult to operate, and to reduce wait time between measurements. Applicable in metalworking environments such as the automotic or aerospace industry, among others.
The XM Series is easy to introduce as it does not require specific installation locations or specialized personnel, making it suitable for a wide range of applications. It can also easily be used alongside pre-existing CMMs. With a maximum measurement range of 2m, it can handle large workpieces with ease.
Prior to implementation, we used to transport parts to a dedicated measurement room with a large CMM for inspection. Now, most parts can be measured on-site, resulting in a significant reduction in measurement man-hours. Due to this, we have been able to save up to one full day of work.
Previously, as we had to outsource measurements, the acceptance process for parts was not completed on-site. This is now possible. Thanks to this, processes from part ordering to delivery and scheduling of mold assembly work can be more accurately and efficiently managed, leading to the shortening of processes in the entire "Mold Chart and Parts Management System."
Source: iPROS Manufacturing(https://www.ipros.jp/catalog/detail/477092)


Source: Carl Zeiss Website(https://www.zeiss.com/metrology/products/systems/cmm.html)
Equipped with the "VAST gold sensor" that ensures high accuracy and reproducibility. With its high resolution, the XENOS is capable of detecting even the slightest deviations. Utilizing linear drives on all axes enables high speeds, rapid acceleration, precise positioning, and drive without shear force. Recommended for environments facing challenges like frequent measurement rework, or for companies aiming to improve productivity.
To quickly obtain results and surpass competitors in terms of quality assurance, we decided to purchase ZEISS XENOS. The length measurement error in a range of 1 cubic meter is only 0.3 micrometers. This high level of precision allows us to identify errors in the work. Due to this, we have been able to troubleshoot quickly, leading to an overall optimization of the process.


Source: Mitutoyo Website(https://www.mitutoyo.com/products/coordinate-measuring-machines/)
To answer the increasing demand for monitoring operational status and maintenance management of equipment via networks in smart factories, this CMM is equipped with new technology for online monitoring of precision measuring instruments.
Operational status, cumulative history of key parts, etc. can be monitored online. The CRYSTA-Apex addresses the needs of companies that want to advance their factory automation infrastructure to boost productivity through the implementation of IoT and production line integration.
At Toray Carbon Magic, Mitutoyo's CNC CMM "CRYSTA Apex S" was introduced to meet precision requirements for manufacturing components of medical devices. Until now, shape measurement with a 3-axis control probe had been challenging for us, but the introduction of "CRYSTA Apex S," featuring a 5-axis control scanning head, enabled measurement of complex and difficult shapes, contributing to the improvement of our quality assurance.
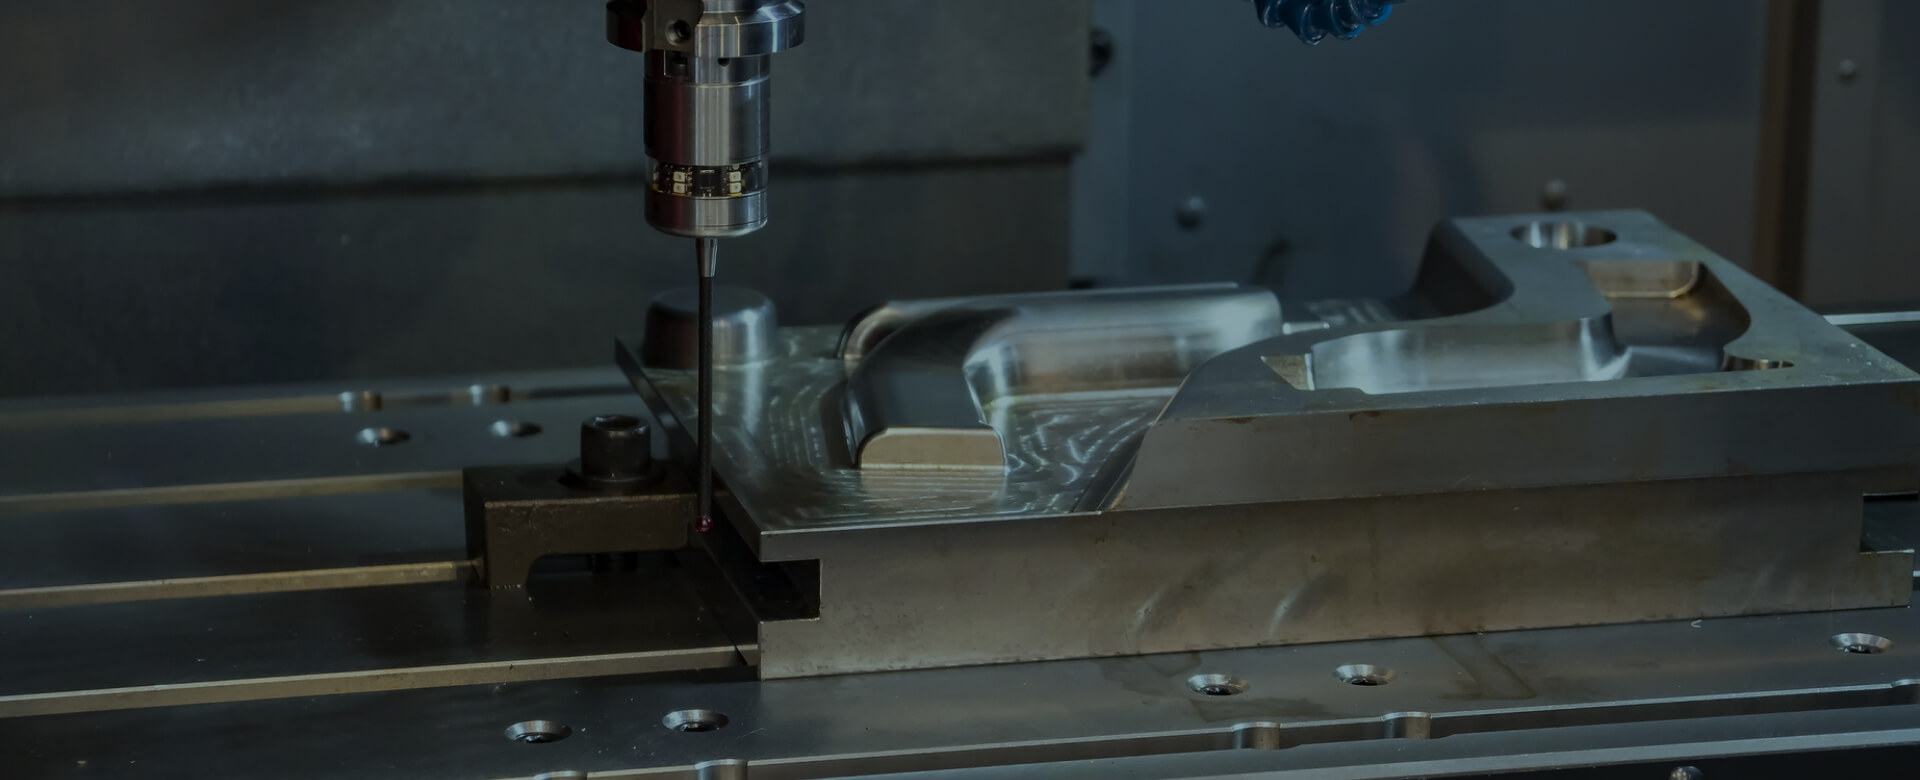
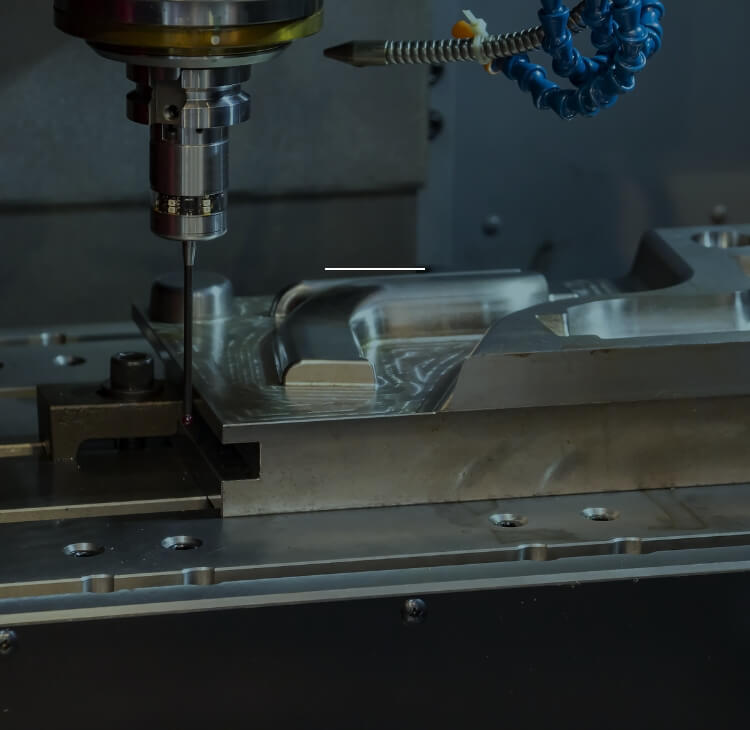
| Product name (Manufacturer) |
shape | Measurement Method |
Operation Method |
Features |
|---|---|---|---|---|
|
[PR]XM Series (KEYENCE)

Source: KEYENCE Website(https://www.keyence.com/products/3d-measure/cmm/xm/) |
Handheld-type | Contact | Manual | Handheld CMM with a caliper-like feel. Allows even beginners to perform high-precision measurements. Easy to introduce with low installation hurdles, suitable for quick and easy use. A measurement range of up to 2m allows for measurements of large workpieces. |
|
[PR]WM Series (KEYENCE)
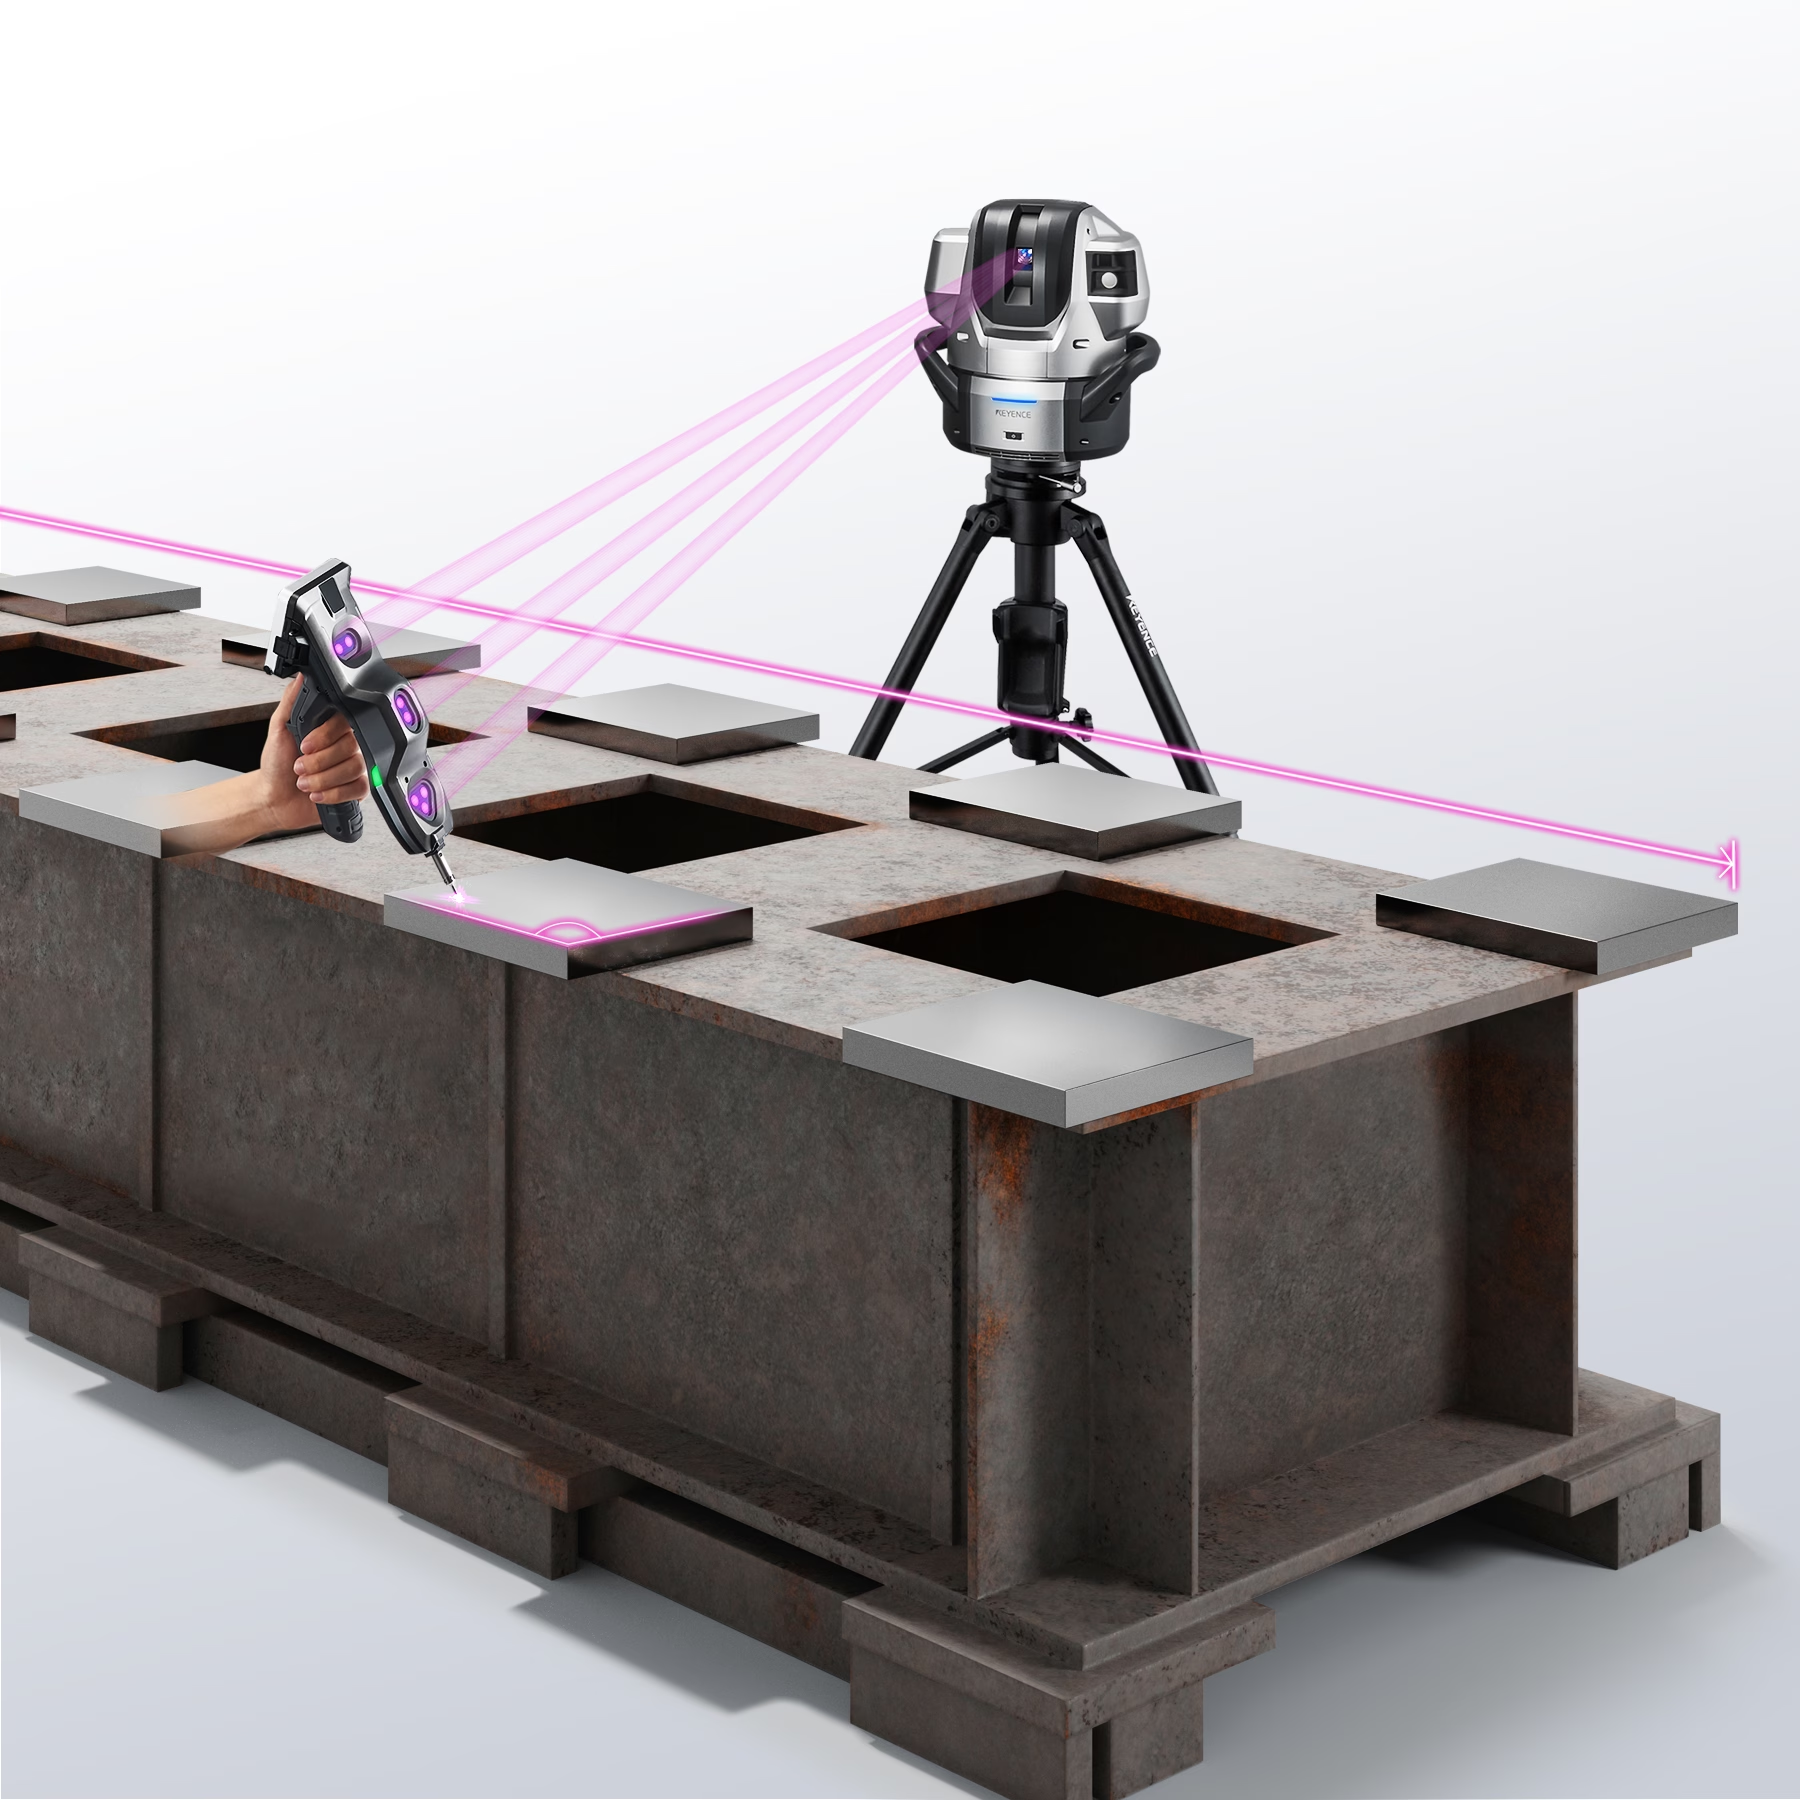
Source: KEYENCE Website(https://www.keyence.com/products/3d-measure/cmm/wm/) |
Handheld-type | Contact | Manual | It is a portable wide-area CMM that can be carried to the measurement site. With a maximum measurement range of 25 m, it can be used for measuring large products, equipment, assembly jigs, and plant piping. It also supports both contact probing for dimensional measurement and laser scanning for shape measurement. |
|
ZEISS XENOS (Carl Zeiss)
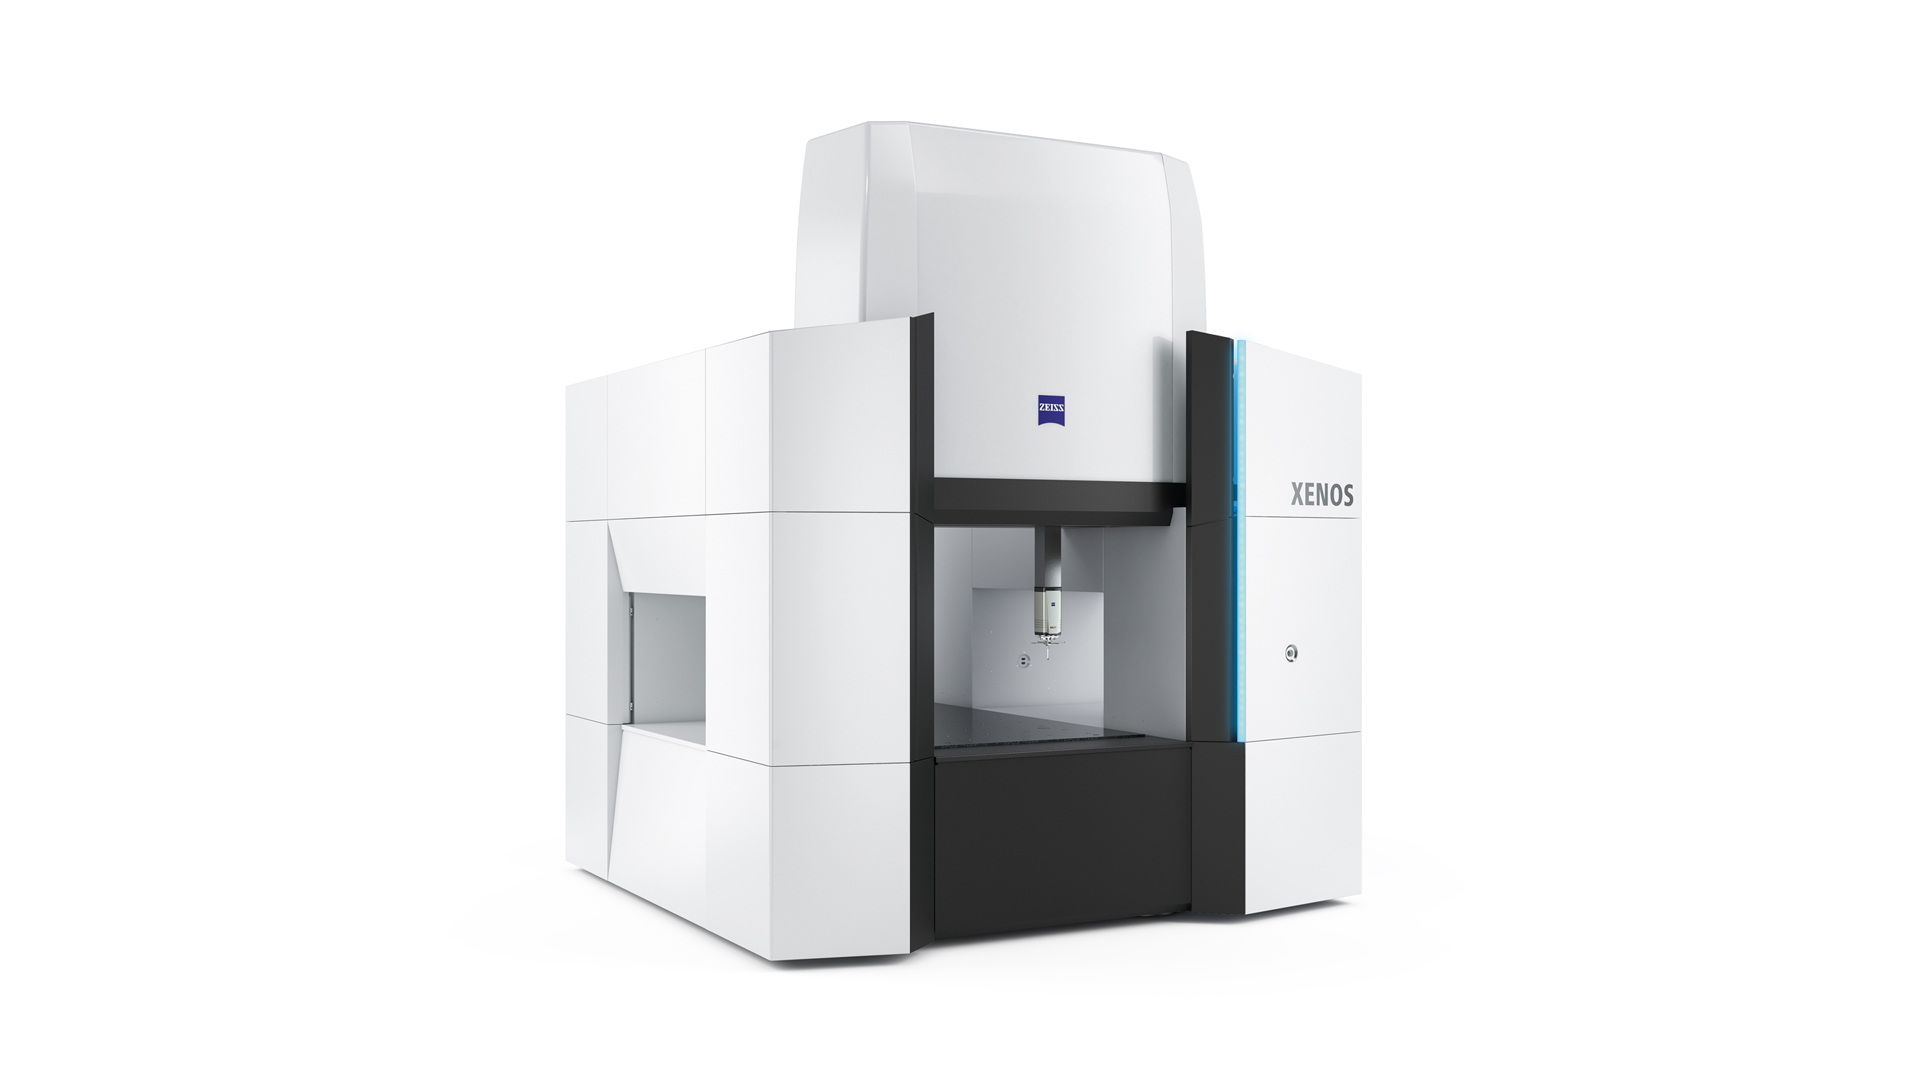
Source: Carl Zeiss Website(https://www.zeiss.com/metrology/products/systems/cmm.html) |
Bridge-type | Contact | CNC | An essential machine for fields requiring high precision, such as research, aerospace, and optical equipment. Achieves extremely high repeatability through various innovations and technologies in materials and structure. |
|
ZEISS PRISMO (Carl Zeiss)
Source: Carl Zeiss Website(https://www.zeiss.com/metrology/products/systems/cmm/bridge-type-cmms/prismo.html) |
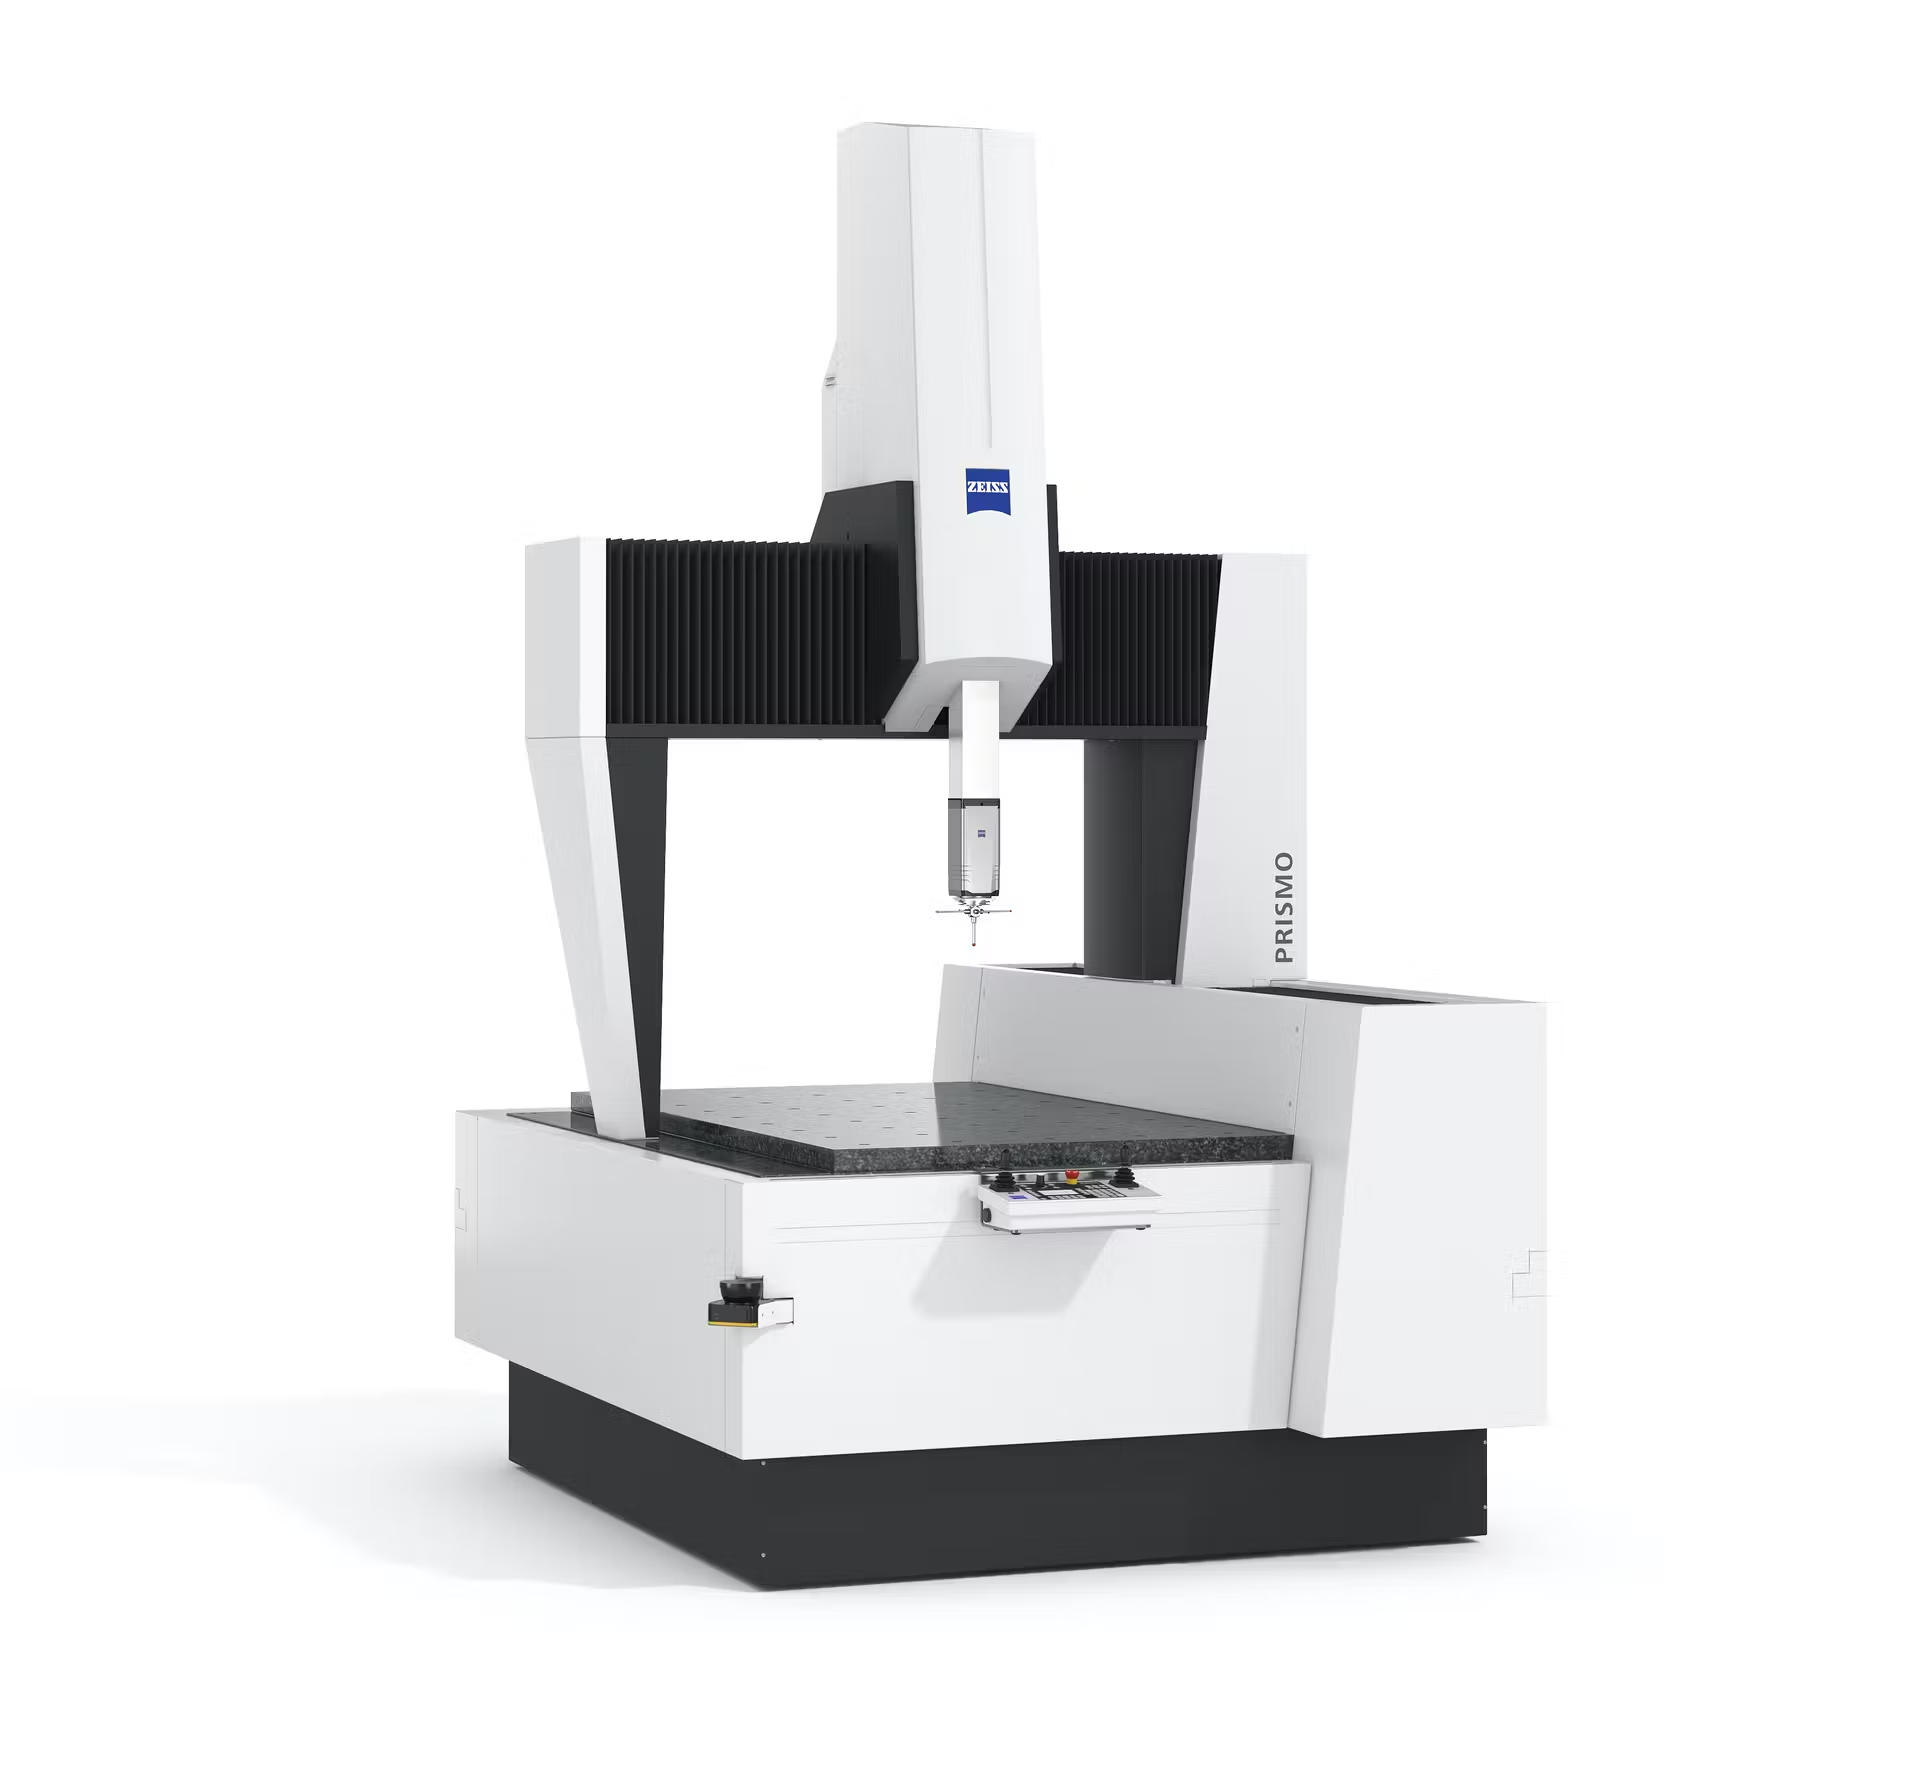
Bridge-type | Contact | CNC | Equipped with various sensors for both contact and non-contact measurements. Guarantees high accuracy with a maximum permissible length measurement error of E0, MPE = 0.9+L/350 μm over a wide temperature range of 15 to 30℃. |
|
ZEISS DuraMax (Carl Zeiss)
Source: Carl Zeiss Website(https://www.zeiss.com/metrology/products/systems/cmm/production-cmms/duramax.html) |
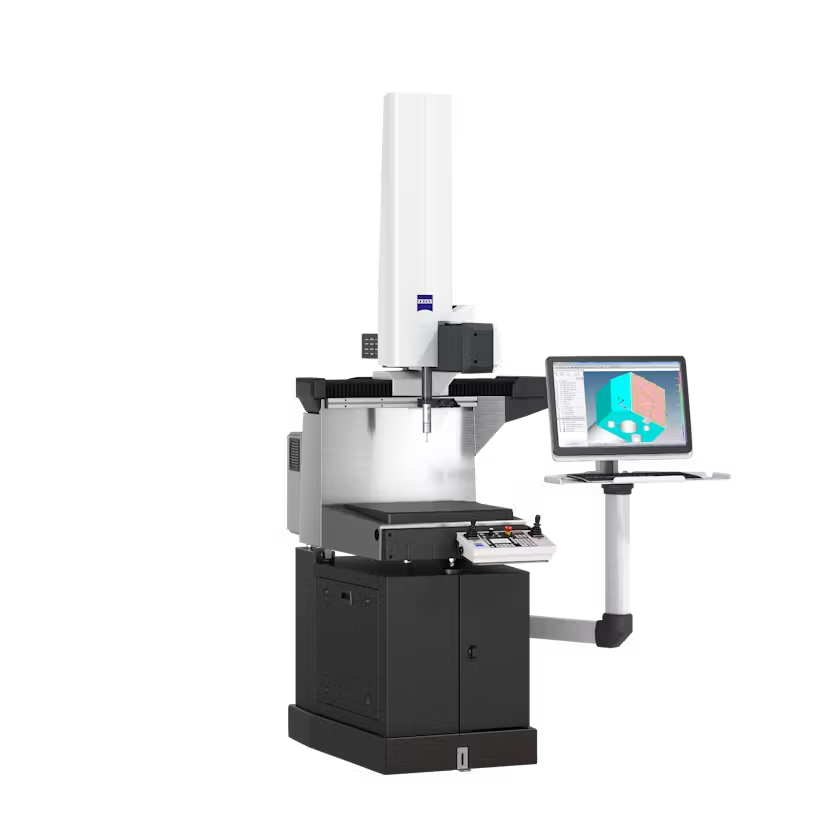
Cantilever-type | Contact | Manual | A compact scanning probe allows precise measurement of complex shapes. Capable of evaluating geometric tolerances and deviations, such as circularity and flatness, using the versatile measurement program Calypso. |
|
CRYSTA-Apex Series (Mitutoyo)
Source: Mitutoyo Website(https://www.mitutoyo.com/products/coordinate-measuring-machines/) |
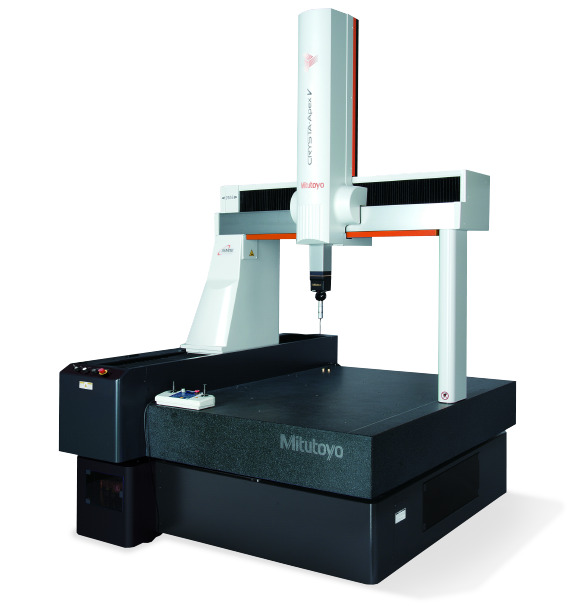
Bridge-type | Contact | CNC | Known for high precision, ensuring a maximum permissible length measurement error of 1.7+3L/1000μm in a temperature range of 16 to 26℃. Capable of specifying 3D measurement paths for flexible measurements of complex shapes. |
|
FALCIO APEX Series (Mitutoyo)
Source: Mitutoyo Website(https://www2.mitutoyo.co.jp/eng/new/news/2002/02_03.html) |
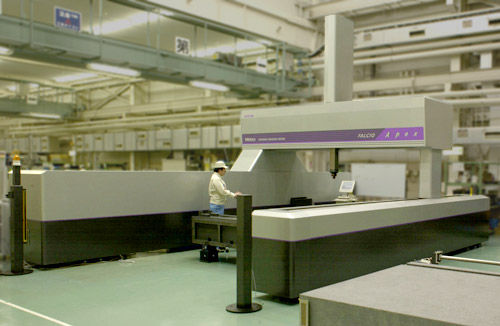
Gantry-type | Contact | CNC | Developed for inspecting large and heavy parts, featuring an original structure (gantry movement/foundation installation type). Utilizes high-precision linear encoders (produced in-house) for highly accurate measurements. |
|
MiSTAR 555 (Mitutoyo)
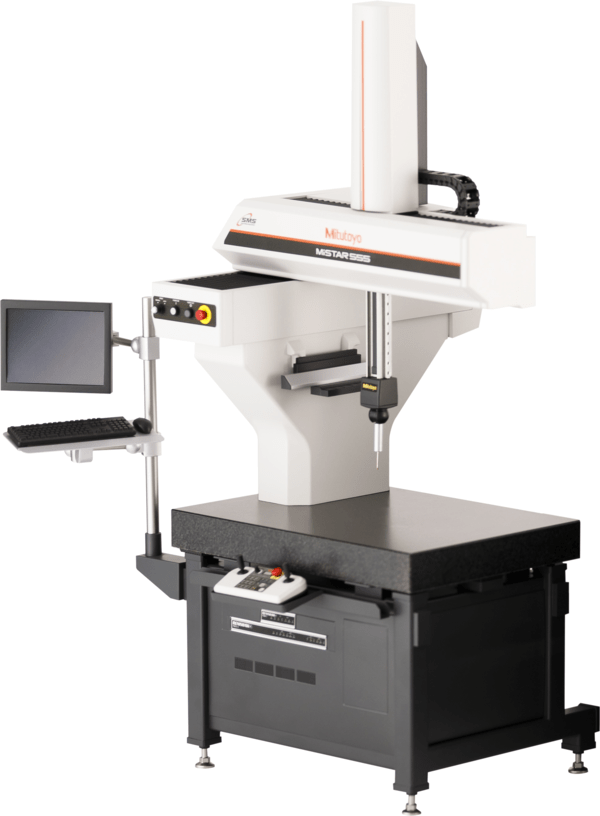
Source: Mitutoyo Website(https://shop.mitutoyo.eu/web/mitutoyo/en/mitutoyo/MiStAR555/MiSTAR%20555/index.xhtml) |
Cantilever-type | Contact | CNC | Developed as a "measurement machine suitable for a wide variety of installation environments," ideal for shop floor use. Resistant to dirt, it can be used comfortably even in environments where oil mist scatters. Its temperature range is 10 to 40℃. |
|
CRYSTA-Plus (Mitutoyo)
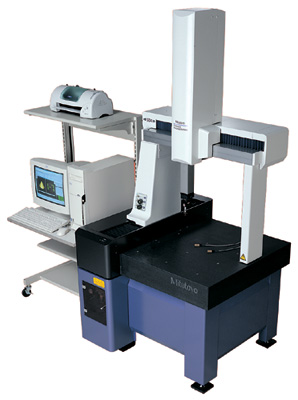
Source: Mitutoyo Website(https://www2.mitutoyo.co.jp/eng/new/news/2002/02_14.html) |
Bridge-type | Contact | Manual | A manual CMM that combines Mitutoyo's technology with user demands, emphasizing ease of use. Equipped with a temperature correction function, ensuring advanced measurements in a wide temperature range. |
|
LEGEX Series (Mitutoyo)
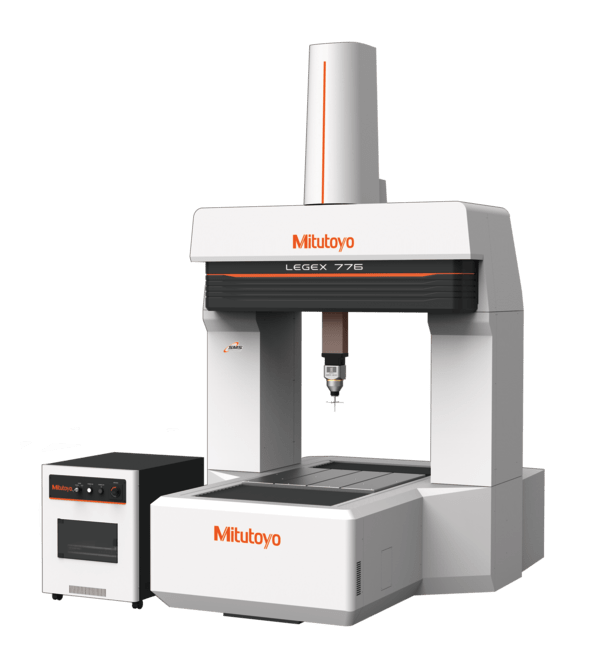
Source: Mitutoyo Website(https://shop.mitutoyo.eu/web/mitutoyo/en/mitutoyo/LEGEX%20Series%20322%252F574/LEGEX%20Series/index.xhtml) |
Bridge-type | Contact | CNC | Eliminates factors causing measurement errors through various technologies, such as a sealed structure, structural design of the drive unit, and vibration countermeasures. Also features temperature correction, ensuring accuracy in a wide temperature range. |
|
GLOBAL Series (Hexagon Metrology)
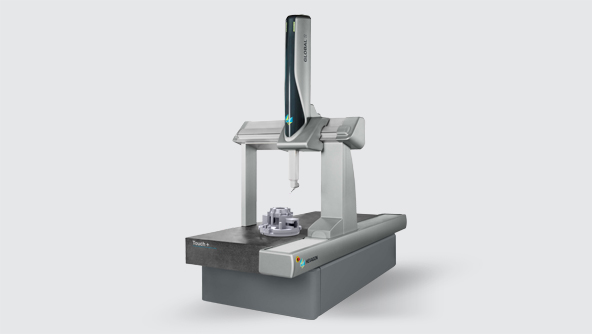
Source: Hexagon Metrology Website(https://hexagon.com/products/global-touch) |
Bridge-type | Contact | CNC | CMM series of Hexagon Metrology, a global leader in measurement machines. Includes models like "GLOBAL S" and "GLOBAL Touch+" that provide excellent performance and productivity. |
|
Leitz Infinity (Hexagon Metrology)
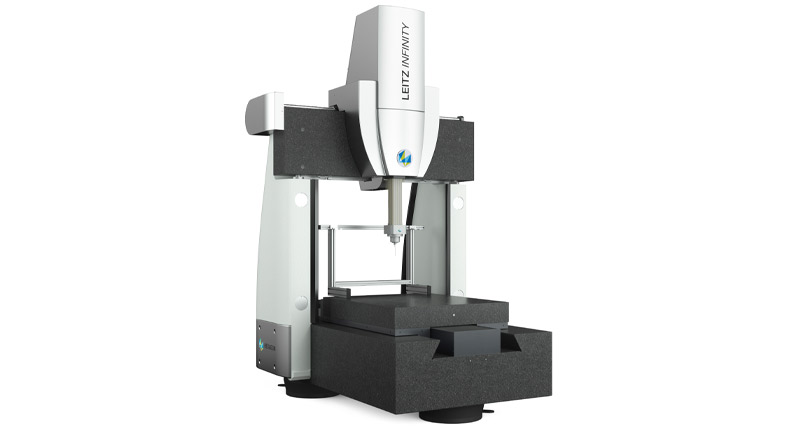
Source: Hexagon Metrology Website(https://hexagon.com/products/leitz-infinity) |
Bridge-type | Contact | Manual | A CMM that achieves unparalleled accuracy, especially suitable for measuring complex parts with strict tolerances, such as angular parts, cylindrical gears, and globoid worm gears. |
|
ALPHA (Hexagon Metrology)
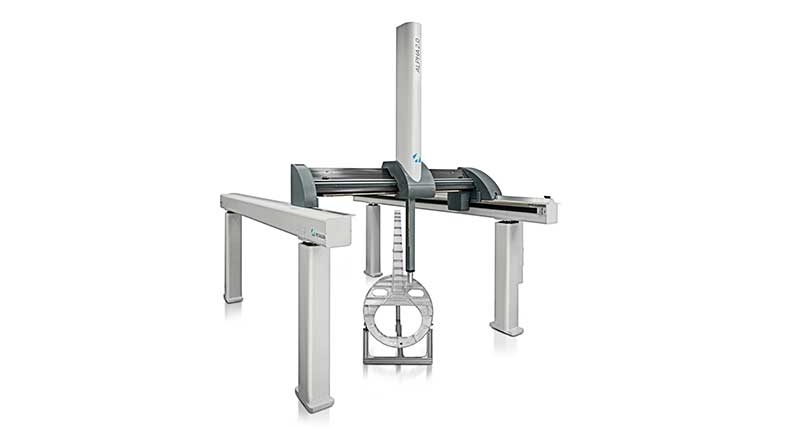
Source: Hexagon Metrology Website(https://hexagon.com/products/alpha-2-0) |
Gantry-type | Contact | - | A gantry-type CMM for accurately inspecting large parts in production sites, production cells, and measurement rooms. Available in two versions: ALPHA Classic and ALPHA Performance. |
|
TIGO SF (Hexagon Metrology)
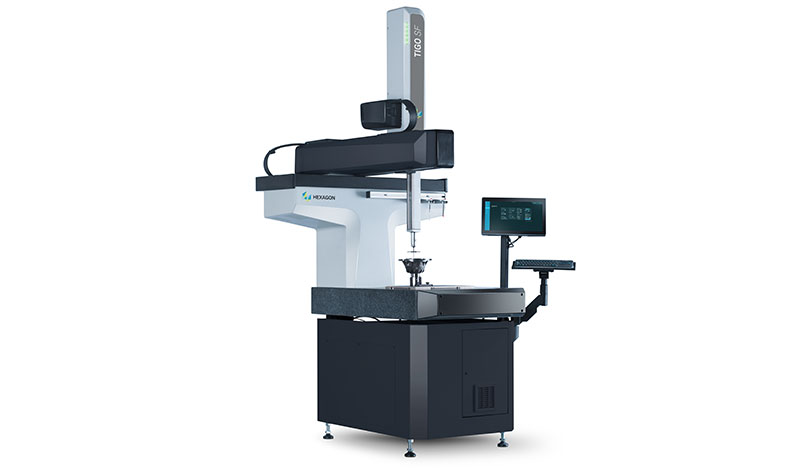
Source:Hexagon Metrology Website(https://hexagon.com/products/tigo-sf) |
Cantilever-type | Contact | CNC | A compact CMM that can be used comfortably in harsh manufacturing environments due to its robust structure and different types of covers preventing dust and dirt entry. Offers wireless operation through Bluetooth and Wi-Fi connections. |
|
MCAx S (Nikon)
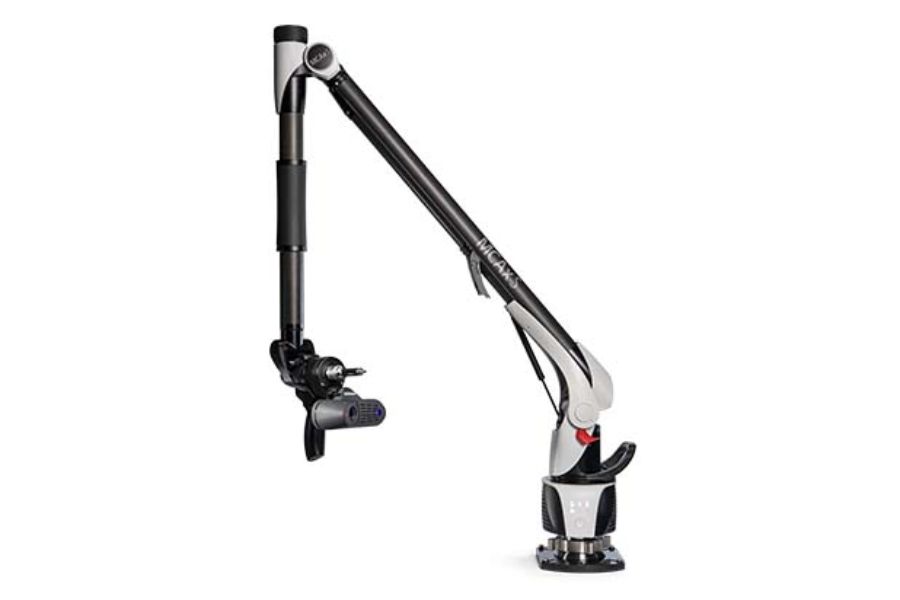
Source: Nikon Website(https://industry.nikon.com/en-us/products/3d-laser-scanners/manual-3d-scanning/mcaxs/) |
Arm-type | Contact | CNC | A 7-axis portable articulated coordinate measuring arm for easily measuring around and inside large parts. Compatible with tripods and other bases, allowing versatile placement for measurements in various locations. |
|
Gage Max FARO ARM (FARO)
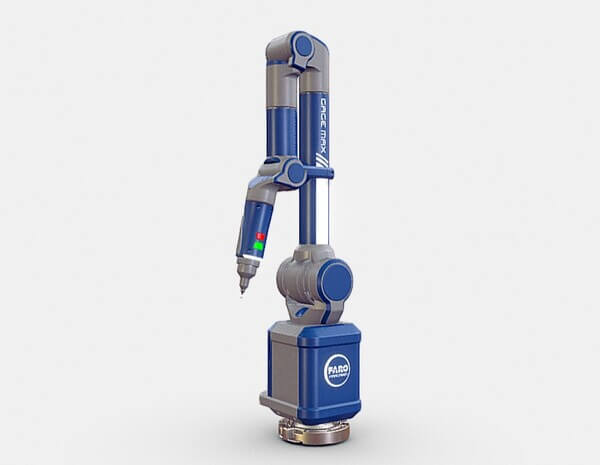
Source:FARO Website(https://www.faro.com/ja-JP/Products/Hardware/Gage-FaroArm) |
Arm-type | Contact | CNC | An arm-type measuring machine that can be used in various locations. Compact and reasonably priced, with a track record of numerous successful introductions at different sites. Supports wireless inspection by connecting to Bluetooth or Wi-Fi. |
Portable, User-Friendly Measurement Solution with High Accuracy
The KEYENCE handheld CMM is highly portable, designed for use anywhere with simple placement on a table and an image navigator for confirming measurement points. It offers a repeatability accuracy of ±3 μm using a handheld probe. Unlike traditional CMMs requiring extensive training, KEYENCE’s model is intuitive and user-friendly, comparable to using a vernier caliper, ideal for beginners. The CM Series is versatile, fitting various work environments by measuring on a target stage or with the head attached to a pole or tripod. Its reference camera ensures precise rotation capture for high-accuracy measurements. Additional features include a color map for comparing results to 3D CAD data and statistical analysis tools.
Compact, Portable CMM for Large-Scale Measurement with Versatile Probing Options
The KEYENCE WM series is a compact CMM designed for measuring large products and devices, with a maximum measurement range of 25 meters. It is portable, easily transported in a dedicated case, and requires minimal setup—users can start measuring by pressing a button on the probe. The WM series supports both contact and laser-scanning probes, enabling precise measurement of dimensions and shapes. Wireless probes eliminate routing limitations, allowing for extensive range measurement without preprocessing steps like spraying or sealing. Measurement results can be displayed in a color map, exported to data files, and automatically converted into inspection reports, streamlining the measurement process.
XM / XM6000
| Body Mass | Approximately 8 kg |
|---|---|
| Repeatability | ±3 μm |
| Indication Accuracy | ±(7 + 9L/1000) μm* (where L is the length of the measurement) |
| Maximum Measurement Range | W 2000 mm / D 1200 mm / H 1000 mm |
| Minimum Display Unit | (Distance) 0.0001 mm / (Angle) 0.0001 degrees |
| Environmental Tolerance | Temperature +10 to 35°C / Humidity 20 to 80% RH (no condensation) |
| Dimensions | (Camera Unit)W518.0 mm / H 388.6 mm / D 979.8 mm |
WM / WM series
| Body Mass | Approximately 7.2 kg |
|---|---|
| Repeatability | ±10 μm |
| Indication Accuracy | ±(28 + 5L/1000) μm (within the guaranteed accuracy range, at an environmental condition of +23 ±1°C) |
| Maximum Measurement Range | WM-C6010: W10,000 mm / D3,500 mm / H5,000 mm WM-C6025: W25,000 mm / D11,000 mm / H12,500 mm |
| Minimum Display Unit | (Distance) 0.001 mm / (Angle) 0.001° |
| Environmental Tolerance | 0 to 40°C / Maximum 80% RH (no condensation) |
| Dimensions | W278.6 mm / H326.6 mm / D284.2 mm |
Pioneering Japanese Manufacturer with a Focus on Innovation and Global Service
KEYENCE, established in 1974, is a Japanese manufacturer known for sensors, measuring instruments, image processing equipment, and control instruments. Approximately 70% of its new products are either world or Japan firsts. The company focuses on understanding customer needs, purpose-driven innovation, and direct sales. Operating in 46 countries with 240 locations, KEYENCE maintains a high level of service and support, including same-day shipping and free test machine loans.
Portable, User-Friendly Measurement Solution with High Accuracy
he AMS-M Series is a bridge coordinate measuring machine designed for small to medium-sized enterprises. It features high-quality granite construction across all axes, ensuring excellent rigidity and stability against temperature variations. The machine includes a motorized CNC programmable system and a modern digital motion control system for precise operation. Additionally, it is equipped with advanced CAD-compatible VDMIS software, enabling efficient and accurate measurements. Air bearings on all axes contribute to smooth and continuous motion control, enhancing precision and dynamic performance.The AMS-M Series is noted for its advanced design, ease of maintenance, and high-performance capabilities.
The AMS-H Series represents a significant advancement in horizontal arm rail-mounted (RM) coordinate measuring machines (CMMs). Designed to overcome the droop issue common in traditional horizontal arms, it features a horizontal Y-axis constructed from advanced composite materials, providing both lightweight and rigidity. The series includes a state-of-the-art digital motion control system and is equipped with the latest CAD-compatible VDMIS software. It utilizes double scale and drive systems, continuous motion control, and mechanical bearings. All axes incorporate high-precision linear guideway technology and 1-micron resolution scales, ensuring exceptional volumetric accuracy. The modular design allows customization to specific measurement volumes, including twin arm systems for complete car body inspections.
The AMS-G Series is a gantry-type coordinate measuring machine (CMM) designed for the precise inspection of large components, such as automobiles, aircraft, ships, and molds. It builds on the capabilities of the AMS-M and AMS-H series with enhanced features, including high-quality granite for all axes, ensuring exceptional rigidity and thermal stability. The CMM incorporates a high-power transmission system and a double scale driving system for precise and effortless positioning. Equipped with a motorized CNC programmable system, advanced digital motion control, and CAD-capable VDMIS CMM software, the AMS-G delivers superior accuracy and dynamic performance. The machine's air bearings and continuous motion control contribute to its overall precision and ease of maintenance.
| Body Mass | 2750kg-3100kg-3450kg-3900kg-5060kg |
|---|---|
| Repeatability | Not listed on the official website |
| Indication Accuracy | MPEE(µm)2.9+3.3L/1000-3.2+2.2L/1000-3.2+3.3L/1000 MPEP(µm)2.9-3.2 |
| Maximum Measurement Range | X1000-1200-1500mm/Y1200-1500-2000mm/Z800-1000mm |
| Minimum Display Unit | Not listed on the official website |
| Environmental Tolerance | Temperature:18-22°C / Relative Humidity: 55%-65% |
| Dimensions | X1750-1950mm/Y2550-2800-3300mm/Z3200-3450mm |
| Body Mass | Not listed on the official website |
|---|---|
| Repeatability | Not listed on the official website |
| Indication Accuracy | Not listed on the official website |
| Maximum Measurement Range | Not listed on the official website |
| Minimum Display Unit | Not listed on the official website |
| Environmental Tolerance | Not listed on the official website |
| Dimensions | Not listed on the official website |
| Body Mass | 9800kg~16200kg |
|---|---|
| Repeatability | Not listed on the official website |
| Indication Accuracy | Not listed on the official website |
| Maximum Measurement Range | X2000-2500-3000mm/Y3000-4000-5000-6000mm/Z1500-1800-2000mm |
| Minimum Display Unit | Not listed on the official website |
| Environmental Tolerance | Not listed on the official website |
| Dimensions | Not listed on the official website |
Advanced CMM Solutions for Diverse Needs
Founded in 2009 in Houston, TX, AMS focuses on developing high-quality CMM mechanical structures, integrating motion control and software from leading manufacturers. With operations in the USA, England, Canada, and Mexico, AMS offers standalone CMMs and multi-sensor systems, including optical and laser measurements. The company emphasizes cost-effective, high-performance solutions by using standard components to minimize maintenance and calibration costs. AMS provides customized solutions and expert support to optimize CMM setups according to specific customer needs.
Aberlink’s Axiom too represents two decades of development in coordinate measuring machines (CMMs). Designed for small to medium-sized parts up to 500 kg, it features an all-aluminum bridge construction that ensures stability and temperature adaptability, critical for precision in varying environments. The Axiom too is available in four sizes with Y-axis travel up to 1500mm and can be configured as manual, CNC, or high-spec variants. It supports touch-trigger probes, continuous contact scanning probes, and Aberlink’s non-contact camera system. The machine’s high-tech granite and honeycomb aluminum table, combined with air bearings and robust design, ensure accurate and reliable performance. The Axiom too is offered as a complete package, including machine, PC, software, probe, and training.
The Aberlink Horizon 800 is designed for medium to large parts with a maximum load capacity of 1000 kg. It features frictionless linear drives using non-contact linear motors, which enhance reliability, reduce maintenance, and enable high-speed, smooth, and quiet operation. The CMM's granite table and Y-axis rail leverage the material's thermal density, with the Y-axis drive positioned to mitigate heat impact on measurement accuracy. The Horizon 800 offers exceptional performance for contact scanning tasks, with a first-term accuracy specification of less than 2 microns. Its innovative design and advanced drive system make it suitable for precise and efficient measurement in demanding environments.
The Aberlink Fulcrum is a manual, portable coordinate measuring machine (CMM) optimized for inspecting small parts directly on the shop floor. It features a three-axis design that provides ease of use and space efficiency. The CMM is equipped with intuitive software that facilitates rapid measurement, delivering results within minutes of activation. It offers a high volumetric accuracy of 5 microns at 40 nanometers. Key features include magnetic soft buttons for quick function changes, magnetic fixture templates for accurate part positioning, and a bespoke star styli kit for precise measurement of side-face features. Supplied with an all-in-one PC and Aberlink Mk4 software, the Fulcrum is designed for efficient, high-quality inspections right at the point of manufacture.
| Body Mass | Not listed on the official website |
|---|---|
| Repeatability | Not listed on the official website |
| Indication Accuracy | [TP20](2.4 + L/250)µm *Maximum Permissible Error MPEE within the thermal limits defined for optimum temperature range. |
| Maximum Measurement Range | X 640 Y 600, 900, 1200 Z 500 |
| Minimum Display Unit | 0.5µm |
| Environmental Tolerance | 5 - 45°C (Optimum Temp Range 18 - 22°C **Installation environmental thermal limits: Rate of change <1°C /hr and <2°C/24hr. Temperature gradient <1°C/m) |
| Dimensions | X 1040 Y 900, 1200, 1500 Z 2320 |
| Body Mass | Not listed on the official website |
|---|---|
| Repeatability | Not listed on the official website |
| Indication Accuracy | [TP20](2.4 + L/250)µm [TP200](2.3 + L/250)µm [SP25M](2.1 + L/250)µm *Maximum Permissible Error MPEE within the thermal limits defined for optimum temperature range. |
| Maximum Measurement Range | X 640 Y 600, 900, 1200 Z 500 |
| Minimum Display Unit | 0.5µm |
| Environmental Tolerance | 5 - 45°C (Optimum Temp Range 18 - 22°C **Installation environmental thermal limits: Rate of change <1°C /hr and <2°C/24hr. Temperature gradient <1°C/m) |
| Dimensions | X 1040 Y 900, 1200, 1500 Z 2320 |
| Body Mass | Not listed on the official website |
|---|---|
| Repeatability | Not listed on the official website |
| Indication Accuracy | [TP20](2.1 + L/250)µm [TP200](2.0 + L/250)µm [SP25M](1.8 + L/250)µm *Maximum Permissible Error MPEE within the thermal limits defined for optimum temperature range. |
| Maximum Measurement Range | X 640 Y 600, 900, 1200 Z 500 |
| Minimum Display Unit | 0.1µm |
| Environmental Tolerance | 5 - 45°C (Optimum Temp Range 18 - 22°C **Installation environmental thermal limits: Rate of change <1°C /hr and <2°C/24hr. Temperature gradient <1°C/m) |
| Dimensions | X 1040 Y 900, 1200, 1500 Z 2320 |
| Body Mass | Not listed on the official website |
|---|---|
| Repeatability | Not listed on the official website |
| Indication Accuracy | [TP20](1.9 + L/250)µm [TP200](1.8 + L/250)µm [SP25M](1.75 + L/250)µm *Maximum Permissible Error MPEE within the thermal limits defined for optimum temperature range. |
| Maximum Measurement Range | X 800 Y 1000, 1600 Z 600 |
| Minimum Display Unit | 0.1µm |
| Environmental Tolerance | 5 - 45°C (Optimum Temp Range 18 - 22°C **Installation environmental thermal limits: Rate of change <1°C /hr and <2°C/24hr. Temperature gradient <1°C/m) |
| Dimensions | X 1403 Y 1530, 2130 Z 2700 |
| Body Mass | Not listed on the official website |
|---|---|
| Repeatability | Not listed on the official website |
| Indication Accuracy | (5.0 + L/1000)µm *Maximum Permissible Error MPEE, according to an adapted ISO10360-2 2009 test to suit the Fulcrum, within the thermal limits defined for optimal temperature range. |
| Maximum Measurement Range | X 280 Y 280 Z 150 *Minimum measuring range specified because the usable volume isn’t cubic. |
| Minimum Display Unit | 1.15μrad |
| Environmental Tolerance | 5 - 45°C (Optimum Temp Range 18 - 22°C. The machine should not be positioned where it will be subjected to rapid changes in temperature. Max rate of ambient temperature change should not be more than 1°C/hour.) |
| Dimensions | X 335 Y 830 Z 725 |
Comprehensive CMM and Optical Measurement Solutions Founded in 1993 and headquartered in Eastcombe, Gloucestershire, Aberlink specializes in bridge and delta coordinate measuring machines (CMMs) suitable for various applications and budgets. Their range includes 32 standard sizes of CNC and manual CMMs, all equipped with Aberlink’s intuitive 3D measurement software. Known for innovation, Aberlink's products cater to industries such as aerospace, automotive, electronics, and medical, with 81% of output exported globally.
WENZEL’s LH and XO series of 3D gantry coordinate measuring machines (CMMs) are renowned for their precision and reliability. The LH series features air-bearing guide elements across all axes, which ensure smooth, wear-free operation, while its granite base plates, crossheads, and quills provide exceptional stability and accuracy. This series is noted for high measurement speed and precision, making it a popular choice in various industries for demanding applications. The XO series offers high dynamics and precision at a more accessible price point. It includes a range of customizable sensor technologies and is designed for ergonomic ease, catering to both standard and specialized measurement needs. Both series are manufactured to rigorous quality standards, offering flexibility and long-term durability for custom manufacturing processes.
WENZEL's horizontal arm coordinate measuring machines (CMMs) are designed for high-precision inspection of large and complex components, ideal for industries such as automotive, aerospace, mechanical engineering, and railroads. The RA series features a floor-level base plate with an integrated guiding system, accommodating large and heavy parts with ease and providing excellent accessibility due to its open design. The RS series offers a stable base plate with a laterally mounted guide system, allowing flexible integration into existing setups without the need for a dedicated foundation, and can be relocated with relative ease. The RAX model provides the largest measuring range, often used for the rapid and accurate measurement of sizable components like vehicle bodies and machine parts. Developed in collaboration with a leading automotive manufacturer, the RAX model emphasizes precision and production-readiness.
WENZEL’s LHF and LH-Gantry series 3D coordinate measuring machines (CMMs) are engineered for extremely large measuring volumes while maintaining high precision and minimal wear. These gantry-style CMMs are designed to handle complex and sizable components, such as prismatic parts and large engine shafts, with exceptional accuracy. The LH Gantry model features air bearings in all axes, providing superior stability and rigidity even during dynamic movements, making it suitable for heavy and large-volume workpieces. The LHF model also uses air bearings but is distinguished by its ground-level design, which facilitates excellent access and freedom of movement for measuring large and intricate components. Both series ensure reliable performance and precision in handling oversized measurement tasks.
| Body Mass | Not listed on the official website |
|---|---|
| Repeatability | Not listed on the official website |
| Indication Accuracy | [XO55] 1,5 + L / 350 [XO 87] 1,6 + L / 350 [XO 107] 1,8 + L / 350 |
| Maximum Measurement Range | [XO55] 500 x 500/700/1000 x 500 [XO 87] 800 x 1000/1500 x 700 [XO 107] 1000 x 1500/2000 x 700 |
| Minimum Display Unit | Not listed on the official website |
| Environmental Tolerance | Not listed on the official website |
| Dimensions | Not listed on the official website |
| Body Mass | Not listed on the official website |
|---|---|
| Repeatability | Not listed on the official website |
| Indication Accuracy | [LH65] 0,8 + L / 450 [LH 87] 0,8 + L /450 [LH108] 1,0 + L /450 [LH 1210] 1,6 + L /450 [LH 1512] 1,9 + L /450 [LH 1515] 2,3 + L /450 |
| Maximum Measurement Range | [LH65] 650 x 750/1200 x 500 [LH 87] 800 x 1000/1500/2000 x 700 [LH 108] 1000 x 1200/1600/2000/3000 x 800 [LH 1210] 1200 x 1600/2000/2500/3000 x 1000 [LH 1512] 1500 x 2000/2500/3000 x 1200 [LH 1515] 1500 x 2000/3000/4000 x 1500 |
| Minimum Display Unit | Not listed on the official website |
| Environmental Tolerance | Not listed on the official website |
| Dimensions | Not listed on the official website |
| Body Mass | Not listed on the official website |
|---|---|
| Repeatability | Not listed on the official website |
| Indication Accuracy | Not listed on the official website |
| Maximum Measurement Range | Not listed on the official website |
| Minimum Display Unit | Not listed on the official website |
| Environmental Tolerance | Not listed on the official website |
| Dimensions | Not listed on the official website |
| Body Mass | Not listed on the official website |
|---|---|
| Repeatability | Not listed on the official website |
| Indication Accuracy | [LHF 2517] 3,5 + L / 450 [LHF 3020] 4,6 + L / 450 [LHF 3025] 5,6 + L / 450 [LHF 4025] 6,6 + L / 450 [LHF 5025] 7,6 + L / 450 |
| Maximum Measurement Range | [LHF 2517] 2500 x 4000/5000/6000 x 1700 [LHF 3020] 3000 x 4000/5000/6000 x 2000 [LHF 3025] 3000 x 5000/6000 x 2500 [LHF 4025] 4000 x 5000/6000 x 2500 [LHF 5025] 5000 x 5000/6000 x 2500 |
| Minimum Display Unit | Not listed on the official website |
| Environmental Tolerance | Not listed on the official website |
| Dimensions | Not listed on the official website |
A Leader in Industrial Metrology Founded in 1968 in Heigenbrücken, Germany, WENZEL is the world’s largest family-owned company in industrial metrology. Under the leadership of Dr. Heike Wenzel, the company has grown to provide precision measurement solutions across over 50 countries. WENZEL excels in developing metrology software and maintaining rigorous quality standards, holding certifications like ISO 9001 and VDA 6.4. The company is renowned for its reliable support services, including a dedicated hotline and WENZEL Online Services (WOS), and a central warehouse for prompt delivery of spare parts.
The REVO 5-Axis Measurement System offers advanced scanning measurement capabilities, integrating high-speed, non-contact measurement and surface roughness analysis. Its 5-axis technology reduces dynamic errors during ultra-fast measurements, significantly enhancing accuracy and overall system performance. Unlike traditional CMMs, the REVO system features versatile probes that can be swapped and combined with a change rack, which lowers initial costs and allows customization for various applications. The AGILITY® range, incorporating REVO technology, provides high-speed, accurate, and flexible dimensional measurement and surface roughness inspection, improving manufacturing throughput and quality. With the ability to save 15% to 50% in cycle time compared to 3-axis systems, AGILITY CMMs offer superior feature access and integration, reflecting Renishaw's commitment to innovation in precision measurement.
The REVO Multi-Sensor System, featuring the REVO-2, is a pivotal element in the REVO 5-Axis Measurement System. It transforms 3-axis CMMs into 5-axis measurement devices, significantly enhancing speed and responsiveness to shape changes while eliminating dynamic errors. Operating at 500 mm/s and capturing thousands of points per second, the REVO-2's lightweight head improves adaptability to part variations. Integrated with the UCC S5 CMM controller, it supports the latest REVO sensors, including the RVP vision system. The REVO-2 also features the world’s first ultra-small encoder, ATOM, which minimizes eccentricity errors and optimizes measurement accuracy and speed. The extended tilt axis range and infinite positioning capabilities further enhance stylus setup flexibility and measurement precision.
The UCC S5 is a sophisticated universal CMM controller designed for the REVO-2, enabling precise 5-axis scanning and head control. Leveraging patented technology, the UCC S5 facilitates unique motion commands, synchronization, and high-speed scanning capabilities. It integrates the control loop within the 5-axis measurement system, supporting non-contact image and surface roughness measurements. The controller manages the REVO-2 head, CMM, and probe signals while communicating with the CMM's computer. Essential features include multi-sensor support for tactile, vision, and surface finish measurements, thermal error compensation with 16 temperature channels, and the need for a Renishaw SPA3 amplifier. Setup and commissioning are conducted via Renishaw’s UCCassist-2 software.
| Body Mass | Not listed on the official website |
|---|---|
| Repeatability | Not listed on the official website |
| Indication Accuracy | Not listed on the official website |
| Maximum Measurement Range | Not listed on the official website |
| Minimum Display Unit | Not listed on the official website |
| Environmental Tolerance | Not listed on the official website |
| Dimensions | Not listed on the official website |
| Body Mass | Not listed on the official website |
|---|---|
| Repeatability | Not listed on the official website |
| Indication Accuracy | Not listed on the official website |
| Maximum Measurement Range | Not listed on the official website |
| Minimum Display Unit | Not listed on the official website |
| Environmental Tolerance | Not listed on the official website |
| Dimensions | Not listed on the official website |
| Body Mass | 2.1-2.6kg |
|---|---|
| Repeatability | Not listed on the official website |
| Indication Accuracy | Not listed on the official website |
| Maximum Measurement Range | Not listed on the official website |
| Minimum Display Unit | Not listed on the official website |
| Environmental Tolerance | Not listed on the official website |
| Dimensions | W440 mm/H44mm/D180mm |
Renishaw: Innovation in Precision and Healthcare Technologies Renishaw, founded in 1973, is a global leader in precision engineering and healthcare technologies. Renowned for its touch-trigger probe, the company drives advancements in manufacturing with a commitment to investing 13-15% of annual sales into R&D. Their high-precision measurement systems, including 5-axis measurement technology, set industry standards and enhance various sectors. With operations in 36 countries and a workforce of over 5,000, Renishaw excels in delivering cutting-edge solutions across manufacturing, transportation, agriculture, electronics, and healthcare.
The Galaxy D CMM is a sophisticated horizontal arm coordinate measuring machine designed for high-performance inspection of large-scale objects and complex surfaces. Equipped with a temperature-compensated system, the Galaxy D enhances accuracy and processing speed through direct computer control. It is specifically engineered for inspecting and scanning large parts, offering flexibility in measurement by easily switching between non-contact scanning and tactile detection based on the object's structure. This capability contributes to greater productivity and efficient quality control in environments dealing with large or intricate components.
The Galaxy H Coordinate Measuring Machine (CMM) is a manually controlled horizontal arm system designed for versatile measuring and marking-out tasks in various industrial applications. It is well-suited for use in automobile and motorbike assembly, engineering hardware, and casting. A notable feature of the Galaxy H is its stylus, which includes an index that allows for up to 168 repeated uses. This functionality eliminates the need for re-confirmation after each measurement, thus enhancing efficiency and consistency in shop floor operations. The Galaxy H combines manual control with robust performance, making it a practical tool for routine measurement and layout tasks.
| Body Mass | Not listed on the official website |
|---|---|
| Repeatability | Not listed on the official website |
| Indication Accuracy | Not listed on the official website |
| Maximum Measurement Range | Not listed on the official website |
| Minimum Display Unit | Not listed on the official website |
| Environmental Tolerance | Not listed on the official website |
| Dimensions | Not listed on the official website |
API: Innovators in Laser-Based Metrology Founded in 1987, API is a pioneer in laser-based dimensional metrology equipment. Established by Dr. Kam Lau, the company initially developed laser tracking systems for robotics. Over the past three decades, API has expanded globally and advanced its technology, including high-speed non-contact scanning with the Dynamic 9D LADAR. API provides a range of services from scanning and inspection to calibration and reverse engineering, ensuring reliable and user-friendly CMMs. The company’s ongoing advancements and global expansion reflect its significant role in the metrology industry.
Flexible Gantry CMM for Large Parts with Advanced Scanning and High-Accuracy Options The ALPHA 2.0 is a flexible gantry coordinate measuring machine (CMM) designed for large workpieces, available in Classic and Performance versions. The ALPHA 2.0 Classic offers versatility with optical scanning sensors for digitizing millions of data points, making it suitable for reverse engineering and inspecting large castings and machined parts. The ALPHA 2.0 Performance, featuring a high-rigidity silicon carbide ram and advanced temperature compensation, ensures high accuracy and stability under various conditions. Both versions benefit from a slant bridge X-axis design, a pillar-free structure for easy access, and options for protection against contaminants with bellows and covers. The system supports high-throughput non-contact sensors and continuous motion interpolation for efficient measurement.
Versatile Bridge-Type CMMs with Advanced Scanning, Safety Features, and Temperature Compensation The GLOBAL series consists of versatile bridge-type coordinate measuring machines (CMMs) designed for a range of applications. It includes GLOBAL Touch+ for efficient measuring, GLOBAL Scan+ for advanced tactile scanning, GLOBAL Optics with high-resolution optical sensors, and GLOBAL Speed featuring a laser scanning sensor. The series emphasizes safety and reliability with automatic power-off, deceleration upon entering the work area, and optional real-time machine and environmental monitoring. Key features include a sturdy granite base, a triangular crossbeam for high dynamics, preloaded air bearings for precise positioning, and temperature compensation for consistent results. The CMMs are built for stability and adaptability, with options for extended temperature ranges and messaging lights for operational efficiency.
Ultra-Accurate CMM with Versatile Optical and Tactile Sensors for Complex Geometries The Leitz Infinity stands out as the most accurate 3D coordinate measuring machine (CMM) in its class, combining optical and tactile sensors for versatile measurement capabilities. Its design features a solid granite base, fixed portal with cast iron pedestals, and a granite crossbeam, ensuring exceptional stability and precision. The variable high-speed scanning (VHSS) technology allows the system to adapt scanning speed in real time, optimizing performance for both simple and complex geometries. This makes the Leitz Infinity suitable for a wide range of measurement tasks, from prismatic workpieces to intricate cylindrical or globoid gears.
Versatile CMM for Shop-Floor Accuracy with Extended Temperature Range and Flexible Probing Options The TIGO SF is a versatile coordinate measuring machine (CMM) designed for shop-floor environments. It offers a measurement volume of 500 x 580 x 500 mm and features a robust, air-free movement system to maintain accuracy in challenging conditions. The machine is equipped with a granite worktable and a range of fixturing holes, enhancing part placement efficiency. Its cantilever structure provides accessibility from three sides, supporting both manual and automated part handling. The standard configuration includes an HP-S-X1C fixed probe head, with options for automatic and manual probes. Additionally, the TIGO SF has an extended temperature range option, enabling operation up to 40°C.
| Body Mass | Approximately 3.1-4.0 kg |
|---|---|
| Repeatability | Not listed on the official website |
| Indication Accuracy | MPEE= from 3.5 + 3.5 L/1000 |
| Maximum Measurement Range | W 2000-2500 mm / D 3300-5000 mm / H 1000-1500-1800 mm |
| Minimum Display Unit | Not listed on the official website |
| Environmental Tolerance | Not listed on the official website |
| Dimensions | W 3460-3960 mm / L 4280-5980 mm / H 3560-4860 mm |
| Body Mass | Not listed on the official website |
|---|---|
| Repeatability | Not listed on the official website |
| Indication Accuracy | Not listed on the official website |
| Maximum Measurement Range | Not listed on the official website |
| Minimum Display Unit | Not listed on the official website |
| Environmental Tolerance | Not listed on the official website |
| Dimensions | Not listed on the official website |
| Body Mass | 750 kg |
|---|---|
| Repeatability | Not listed on the official website |
| Indication Accuracy | Not listed on the official website |
| Maximum Measurement Range | Not listed on the official website |
| Minimum Display Unit | Not listed on the official website |
| Environmental Tolerance | Not listed on the official website |
| Dimensions | Not listed on the official website |
| Body Mass | Not listed on the official website |
|---|---|
| Repeatability | Not listed on the official website |
| Indication Accuracy | E0,MPE = 2.2 + L/300 µm (L in millimeters) |
| Maximum Measurement Range | Not listed on the official website |
| Minimum Display Unit | Not listed on the official website |
| Environmental Tolerance | Not listed on the official website |
| Dimensions | Not listed on the official website |
Leading Digital Reality Solutions with a Focus on CMMs, Efficiency, and Global Industry Impact Hexagon, founded in Sweden in 2000, is a global leader in digital reality solutions and sensor software. With a focus on sustainable value creation, Hexagon develops a range of Coordinate Measuring Machines (CMMs) and information management systems that boost efficiency and quality. The company has a strong global presence, catering to diverse industries such as aerospace, automotive, and construction, with a focus on digitalization and process autonomy. Hexagon's solutions are purpose-driven, aimed at enhancing productivity and reducing costs, while also offering robust support and upgrade options for its products.
ZEISS DuraMax Series: Robust, High-Precision CMMs with Advanced Temperature and Scanning Capabilities The ZEISS DuraMax series offers a range of coordinate measuring machines (CMMs) tailored for demanding production environments. The standard DuraMax model is designed for robustness, precision, and efficiency, making it suitable for at-line measurement in harsh conditions and high temperatures. It features the ZEISS VAST XXT sensor for fast single-point measurements and contour scanning, reducing the need for fixed gauges. The ZEISS DuraMax HTG variant extends temperature range capabilities, incorporating Zerodur scales to minimize heat expansion and temperature sensors for workpiece correction. It also includes additional filter pads for protection against contaminants. Both models benefit from advanced scanning technology and fast tactile probing, with ZEISS VAST probing reducing measurement times by up to 30%, enhancing operational efficiency.
ZEISS PRISMO series: Enhanced Safety, Speed, and Flexibility for Modern Measurement The ZEISS PRISMO represents a significant upgrade over previous models, focusing on stability, accuracy, and speed in various environmental conditions. This series of CMMs include enhanced safety features with integrated laser scanners and DGUV certification, providing better protection and compliance with international standards. Productivity has been improved with faster measurement capabilities and a rotary table axis option that shortens setup time. Ergonomic enhancements include a new control panel holder and more accessible switch placements for improved ease of use and operator safety. The machine’s flexibility is further increased by an expanded range of sizes and sensor options.
ZEISS XENOS: High-end measuring machine for maximum precision The ZEISS XENOS is designed for applications requiring exceptional precision, including research labs, aerospace, and optical industries. This high-end coordinate measuring machine (CMM) offers a measuring range close to one cubic meter, combining advanced precision with significant technical capabilities. It features dual linear drives in the Y-axis, synchronized via unique technology to optimize driving force based on the X-axis position. Constructed with silicon carbide ceramic, the ZEISS XENOS provides double the rigidity of standard aluminum oxide ceramics while reducing weight. Additionally, the machine minimizes accuracy deviations caused by cable movement through improved module distribution and circuit enhancements.
| Body Mass | 350 to 545 kg |
|---|---|
| Repeatability | 1.7 μm |
| Maximum Allowable Length Measurement Error | E₀, MPE = 1.24 + (L / 300) μm to E₀, MPE = 3.9 + (L / 100) μm |
| Measurement Range | X 500 mm / Y 500 mm / Z 500 mm |
| Minimum Display Unit | Not listed on the official website |
| Environmental Tolerance | Temperature: 18 to 30°C / Humidity: Not listed on the official website |
| Dimensions | W1080-1870 mm / H1803-2511 mm / D1360-2000 mm |
| Resolution | 0.2 μm |
| Body Mass | 1700 kg |
|---|---|
| Repeatability | Not listed on the official website |
| Indication Accuracy | 0.9 + L/350 µm (19–21°C) / 1.2 + L/250 µm (15–30°C) ※Accuracy for sizes up to 9/24/7 |
| Maximum Measurement Range | W700-1600 / D900-4200 / H500-1000 mm |
| Minimum Display Unit | Not listed on the official website |
| Environmental Tolerance | Temperature 19-22°C |
| Dimensions | W1568 mm / D1750 mm / H2990 mm |
| Body Mass | 9300 kg |
|---|---|
| Repeatability | ±0.2 μm |
| Indication Accuracy | 0.3 + L/1000 (μm) |
| Maximum Measurement Range | X 900 mm / Y 1300 mm / Z 700 mm |
| Minimum Display Unit | Not listed on the official website |
| Environmental Tolerance | Not listed on the official website |
| Dimensions | W2923 mm / D2956 mm / H3414 mm |
Pioneering Optics with a Focus on Precision, Sustainability, and Global Impact ZEISS is a global leader in optics and optoelectronics, founded in 1846 by Carl Zeiss. As a company owned by the Carl Zeiss Foundation, ZEISS focuses on precision, innovation, and value creation. Its technologies support diverse sectors, including semiconductor manufacturing, medical diagnostics, e-mobility, and film production. ZEISS is committed to sustainability, using 100% green energy and aiming for carbon neutrality by 2025. The foundation reinvests company dividends into scientific research and societal progress. ZEISS integrates corporate responsibility into its operations, supporting educational, healthcare, and environmental initiatives.
The CRYSTA-Apex Series by Mitutoyo includes the latest generation of bridge-type coordinate measuring machines, the CRYSTA-Apex V Series. This series, comprising models V 500, 700, and 900, combines high accuracy, speed, and flexibility. Designed for precise and rapid measurement of complex shapes, the CRYSTA-Apex V Series features advanced temperature compensation to ensure accuracy in varying environmental conditions. It utilizes Mitutoyo's renowned ABS scales for high resistance to environmental factors and eliminates the need for homing upon start-up. With a wide range of customizable probes and SMS capability for status and service monitoring, the CRYSTA-Apex V Series is well-suited for Smart Factory environments.
The CRYSTA-Plus is a manual coordinate measuring machine (CMM) renowned for its long-term precision. It features an optional temperature compensation function, the first of its kind for manual CMMs, ensuring accuracy within a temperature range of 16°C to 26°C. The machine includes bellows to protect against dust contamination and can be retrofitted to CNC operation at a reasonable cost. Designed for user convenience, it has a streamlined fine-feed system for X- and Y-axis adjustments and an optional illumination system for enhanced visual recognition of workpieces. The CRYSTA-Plus offers improved accuracy—12% better than previous manual models—and incorporates the Constant Grip system to minimize human error.
The FALCIO-Apex Series offers advanced measurement capabilities for large and heavy products, featuring a gantry-type design with a moving gate and foundation-mounted structure. This CNC CMM series provides exceptional measurement accuracy and drive speed, setting a global standard for X-axis measuring ranges of 2000 mm and 3000 mm. To counteract accuracy degradation due to foundation deformation, the FALCIO-Apex includes the MOVAC system, which automatically restores measurement precision. Additionally, the series offers optional safety devices, such as Z-axis beam sensors, tape switches, and area sensors. Each unit is built to order, tailored to meet specific measurement needs.
The Mitutoyo LEGEX Series CMM stands at the forefront of ultra-high accuracy measurement technology, designed for complex small-to-medium-sized workpieces such as gears, bearings, lenses, and precision dies. Featuring an advanced fixed-bridge design, the LEGEX minimizes pitch and yaw errors by allowing independent X- and Y-axis operation. Its ultra-high accuracy scale unit, with crystallized glass scales and high-resolution reflection linear encoders, ensures exceptional positioning performance. The CNC CMM achieves a maximum permissible length measuring error of E0, MPE = (0.23 + 0.7L/1000) μm, and is equipped with air-damped spring isolators and FEM structural analysis to mitigate load-induced deformation and factory floor vibrations. This design ensures precise, stable measurements even at high speeds.
The Mitutoyo MiSTAR 555 CMM offers exceptional precision and versatility for shop floor measurements with its compact design and high-speed performance. Its innovative single support moving bridge and integrated controller storage reduce the footprint by approximately 70% compared to conventional models. The MiSTAR is engineered to operate accurately within a temperature range of 10 to 40ºC, utilizing symmetric structure, uniform materials, and advanced temperature compensation. Enhanced with a Mitutoyo absolute scale, the MiSTAR delivers over twice the contamination resistance of traditional CMMs, making it highly suitable for challenging production environments. The three-sided open architecture and specialized clamping tools facilitate efficient setup and measurement of similar workpieces.
| Body Mass | 1675 kg (including control unit and installation base) |
|---|---|
| Repeatability | Not listed on the official website |
| Indication Accuracy | Not listed on the official website |
| Maximum Measurement Range | X-axis 700 mm, Y-axis 700 mm, Z-axis 600 mm |
| Minimum Display Unit | 0.0001 mm (0.1 μm) |
| Environmental Tolerance | Air Usage Conditions: Operating air pressure 0.4 MPa, air consumption 60 L/min (under standard conditions), air source requirement 120 L/min |
| Dimensions | Not listed on the official website |
| Body Mass | 180 kg - 500 kg - 800 kg |
|---|---|
| Repeatability | Not listed on the official website |
| Indication Accuracy | Measuring error (E): 3.5+4.5L/1000 μm - 4.5+4.5L/1000 μm Probing error (R): 4 μm - 5 μm *L: length in mm |
| Maximum Measurement Range | X-axis 500-700 mm, Y-axis 400-700-1000 mm, Z-axis 400-600 mm |
| Minimum Display Unit | Not listed on the official website |
| Environmental Tolerance | Standard 19°C to 21°C / Optional 16°C to 26°C |
| Dimensions | Not listed on the official website |
| Body Mass | 10600 kg - 12500 kg - 15600 kg - 16000 kg |
|---|---|
| Repeatability | Not listed on the official website |
| Indication Accuracy | E₀, MPE 18-22°C TP200: 3.5+4L/1000 µm |
| Maximum Measurement Range | X-axis 2000-3000 mm, Y-axis 3000-4000-5000 mm, Z-axis 1500 mm |
| Minimum Display Unit | 0.0001 mm |
| Environmental Tolerance | Not listed on the official website |
| Dimensions | 4430x5950x4690 mm / 4430x6950x4690 mm / 4430x7950x4690 mm / 5430x7950x4690 mm |
| Body Mass | 3500-5000-5100-6500 kg |
|---|---|
| Repeatability | Not listed on the official website |
| Indication Accuracy | Maximum Permissible Error (E₀, MPE): 0.28 + L/1000 μm, where L is the measurement length in mm (19–21°C, MPP310Q) |
| Measurement Range | X 500-700-900 mm / Y 700-1000 mm / Z 450-600 mm |
| Minimum Display Unit | 0.00001 mm |
| Environmental Tolerance | 18–22°C |
| Dimensions | 1121×1122×2350 mm |
| Body Mass | 655 kg |
|---|---|
| Repeatability | Not listed on the official website |
| Indication Accuracy | (2.2 + 3L/1000) μm, where L is the measurement length (mm) |
| Measurement Range | X 570 mm / Y 500 mm / Z 500 mm |
| Minimum Display Unit | Not listed on the official website |
| Environmental Tolerance | 10°C ~ 40°C |
| Dimensions | 1121×1122×2350 mm |
Leading Precision Measurement Solutions Founded in 1934, Mitutoyo is a global leader in precision measuring instruments, committed to advancing measurement technology through in-house development. Their diverse product range includes high-precision CMMs and advanced optical frequency comb devices. Operating in 30 countries with extensive support services, Mitutoyo combines reliable measurement technology with comprehensive global support, including remote monitoring and engineering assistance. Their philosophy emphasizes contributing to society through precision and innovation in measurement technology.
The Nikon MCAx S is a highly flexible articulated-arm coordinate measuring machine (CMM) designed for precision in various environments. With sizes ranging from 2.0m to 4.5m and a 7-axis movement, it adeptly measures complex shapes and large components. The MCAx S offers three performance levels—S, S+, and S++—to match different accuracy requirements. It features a user-friendly design, including easy installation and operation with options for different mounting methods such as magnetic bases and tripods. Its battery-powered, Wi-Fi-enabled setup supports wireless measurements. The system's efficiency is enhanced with automatic probe switching and real-time scanning status updates. When paired with the ModelMaker H120 laser scanner, the MCAx S delivers high-resolution 3D scans, complying with ISO 10360-12 standards for accuracy.
| Body Mass | Not listed on the official website |
|---|---|
| Repeatability | Not listed on the official website |
| Indication Accuracy | Not listed on the official website |
| Maximum Measurement Range | Not listed on the official website |
| Minimum Display Unit | Not listed on the official website |
| Environmental Tolerance | Not listed on the official website |
| Dimensions | Not listed on the official website |
Pioneering Precision and Global Expansion Founded in 1917, Nikon is a leading Japanese manufacturer renowned for its optical technology and precision instruments. Beyond its famous cameras, Nikon excels in creating high-accuracy measuring tools like CMMs, leveraging extensive expertise in optics. Their products, known for reliability and precision, cater to diverse industrial needs. Nikon is committed to advancing measurement automation and digitalization to enhance manufacturing quality and efficiency. With a robust global presence across the Americas, Europe, and Asia, Nikon’s expansive network supports ongoing innovation and market responsiveness.
The Gage Max FARO ARM is a coordinate measuring machine (CMM) designed for manufacturing environments. Its arm-type design eliminates the need for extensive installation space, allowing it to be set up directly on the production floor. This facilitates rapid product inspection and shortens time to market. Equipped with a 6-axis ergonomic design, the Gage Max FARO ARM supports natural movements and one-hand operation due to its counterbalance feature. It offers probe interchangeability without re-calibration and has a working volume of 1.5 meters (4.9 feet), making it ideal for measuring small parts, molds, and assemblies. The system includes automatic report generation and trend analysis, ensuring consistent measurement repeatability and efficient inspection compared to traditional hand tools.
| Body Mass | Not listed on the official website |
|---|---|
| Repeatability | Not listed on the official website |
| Indication Accuracy | Not listed on the official website |
| Measurement Range | Not listed on the official website |
| Minimum Display Unit | Not listed on the official website |
| Environmental Tolerance | Not listed on the official website |
| Dimensions | Not listed on the official website |
FARO Technologies: Precision Measurement Solutions Established in 1981, FARO Technologies is a leading provider of 3D measurement and imaging equipment. The company introduced the FaroArm in 1995, which has become a key product in their portfolio. With a global presence and over 15 patents, FARO serves industries like automotive, aerospace, and construction. Their products are known for high precision and customization. FARO supports its users through the FARONow! Customer Portal, offering 24/7 access, training, and technical assistance, alongside comprehensive maintenance and service plans.