Introduction
In modern manufacturing environments, measurement is no longer a final checkpoint performed only after production has ended. As production speeds increase and quality requirements become more stringent, manufacturers are rethinking when, where, and how dimensional inspection should be carried out.
Two commonly discussed approaches are in-line measurement and off-line measurement. While both aim to verify product quality and dimensional accuracy, they differ significantly in terms of inspection timing, equipment configuration, accuracy, and operational impact.
This article explains the fundamental differences between in-line and off-line measurement, focusing on dimensional inspection with Coordinate Measuring Machines (CMMs). By understanding the strengths and limitations of each approach, manufacturers can make more informed decisions about inspection strategies that best support their production goals.
What Is the Difference Between In-line and Off-line Measurement?
The primary distinction between in-line and off-line measurement lies in where and when measurement is performed within the manufacturing process.
In-line measurement refers to inspection conducted directly on the production line. Measurement systems are integrated into the manufacturing process and inspect parts automatically as they are being produced. In many cases, measurement results are fed back to the production equipment in real time.
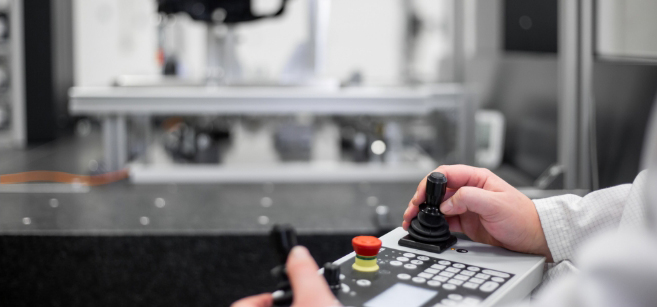
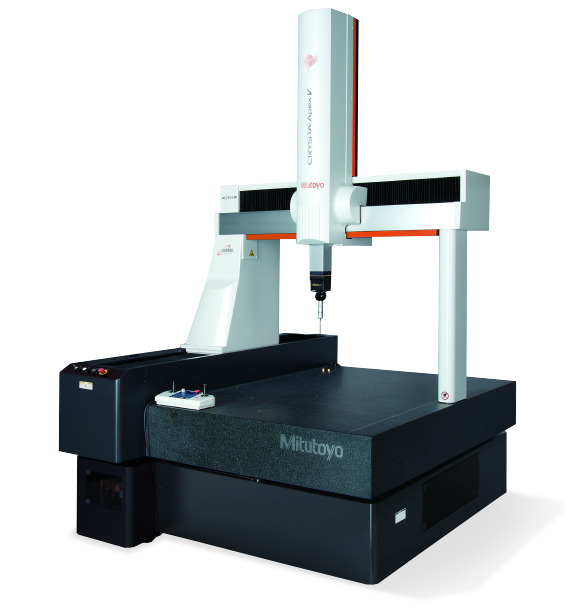
Off-line measurement, on the other hand, is performed away from the production line. Parts are removed from the manufacturing process and brought to a dedicated measurement room or inspection area, where they are measured using equipment such as bridge-type CMMs.
Although both approaches aim to ensure product quality, their roles within a manufacturing system are fundamentally different. In-line measurement emphasizes speed and process control, while off-line measurement prioritizes accuracy, traceability, and detailed analysis.
Advantages and Disadvantages of In-line Measurement
Advantages of In-line Measurement
One of the greatest advantages of in-line measurement is its ability to provide real-time feedback. Because parts are measured during production, deviations can be detected immediately, allowing corrective actions to be taken before large quantities of nonconforming products are produced.
In-line systems also contribute to shorter lead times. Since inspection does not require removing parts from the line or waiting for off-line measurement results, overall production flow can be more efficient.
Another benefit is automation. In-line measurement systems are often designed for unmanned or minimally supervised operation. This reduces reliance on skilled measurement personnel and supports high-volume manufacturing environments.
Disadvantages of In-line Measurement
Despite these advantages, in-line measurement has notable limitations. One key challenge is measurement accuracy. Production lines are subject to vibration, temperature fluctuations, coolant mist, and airborne contaminants, all of which can negatively affect measurement stability.
In-line systems are also typically optimized for specific features or dimensions. As a result, they may lack the flexibility required for complex geometries or detailed geometric tolerance evaluation.
Additionally, integrating measurement equipment into a production line can be costly and complex. System downtime caused by measurement equipment failures may directly impact production output.
Advantages and Disadvantages of Off-line Measurement
Advantages of Off-line Measurement
Off-line measurement is widely regarded as the gold standard for high-accuracy dimensional inspection. Dedicated measurement rooms can be temperature-controlled and isolated from vibration, providing ideal conditions for precise CMM measurements.
Because off-line CMMs are not constrained by cycle time requirements, they can perform comprehensive inspections, including complex geometric tolerances such as position, flatness, profile, and concentricity.
Off-line measurement also supports traceability and documentation. Measurement results can be carefully reviewed, stored, and analyzed, making this approach particularly suitable for first article inspection, process validation, and customer audits.
Disadvantages of Off-line Measurement
The most common drawback of off-line measurement is the time required. Transporting parts to a measurement room, setting them up, and running inspection programs takes longer than in-line inspection.
Off-line measurement may also delay feedback to production. If measurement results are not communicated promptly, defective parts may continue to be produced before issues are identified.
In addition, off-line inspection requires skilled operators who can program CMMs, interpret results, and manage measurement uncertainty. This can increase labor costs and training requirements.
Choosing the Right Measurement Strategy
In practice, in-line and off-line measurement are not mutually exclusive. Many manufacturers adopt a hybrid approach, using in-line measurement for process monitoring and off-line CMMs for detailed verification and quality assurance.
For example, in-line measurement may be used to monitor critical dimensions during mass production, while off-line measurement is reserved for initial setup, periodic audits, or investigation of quality issues.
The optimal measurement strategy depends on factors such as production volume, required accuracy, part complexity, and quality standards. Understanding the characteristics of both approaches enables manufacturers to design inspection systems that balance efficiency and reliability.
Choosing Between In-line and Off-line Measurement
Understanding the difference between in-line and off-line measurement is essential for building an effective quality control strategy. In-line measurement excels at real-time monitoring and automation, while off-line measurement provides superior accuracy, flexibility, and traceability.
Rather than choosing one approach over the other, many manufacturers achieve the best results by combining both. By leveraging the strengths of each method, it is possible to maintain high productivity without compromising measurement quality.
As manufacturing technologies continue to evolve, the role of measurement will become even more integrated into production systems. A clear understanding of in-line and off-line measurement will remain a key foundation for achieving consistent, high-quality manufacturing outcomes.


